Italian Summer Pasta Salad

 Italian Summer Pasta Salad1


After radio silence for 3 weeks, I’m back. Again. Can’t say for how long but I am here. So how are things guys? Here, monsoon has almost arrived and summer is officially over (for good!). But here I am, with a huge backlog of summer recipes. What am I to do when all these days I have been cooking all things “summery” regularly but not getting time to post them. Let’s just say that it is still summer somewhere in the world, right?! 😉

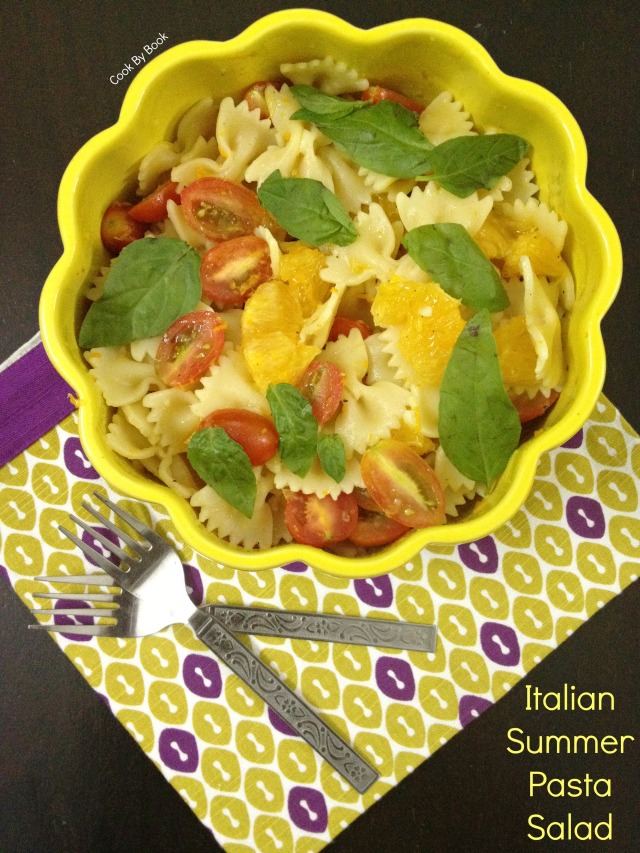
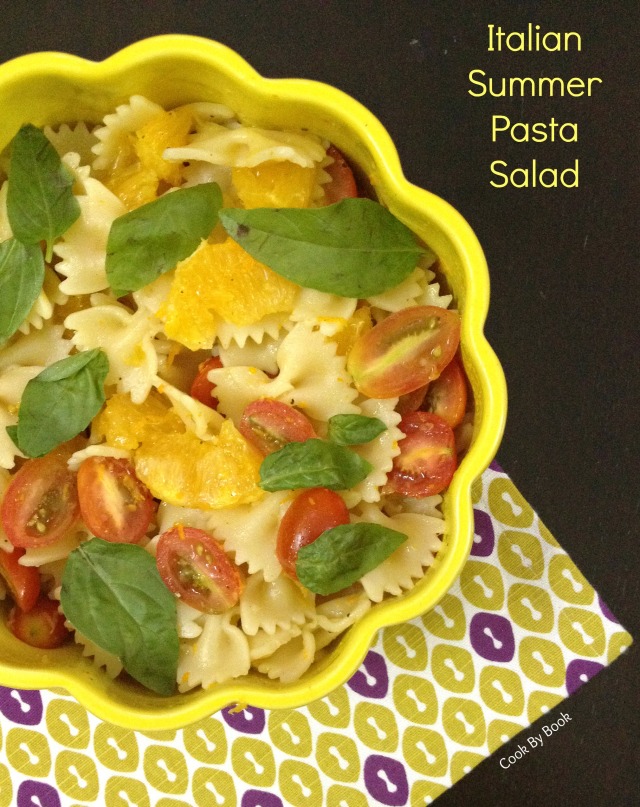
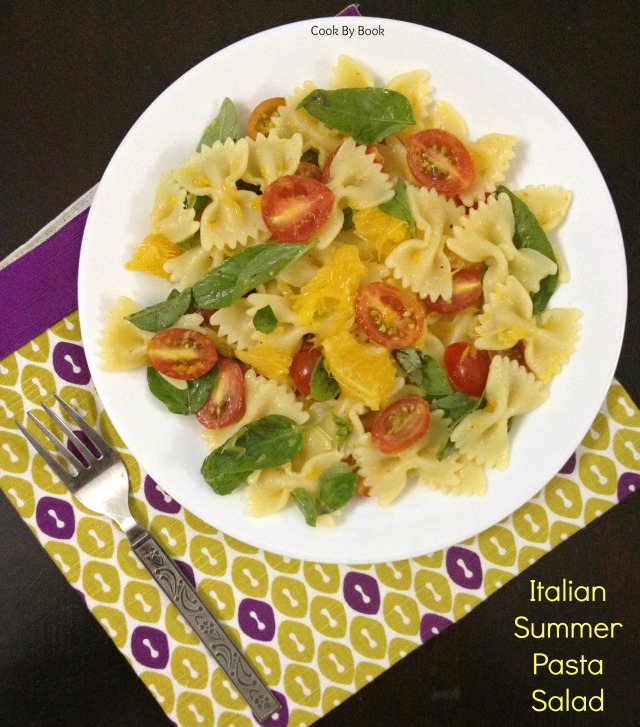
I love anything and everything Italian so when I came across this pretty looking salad on Sommer’s amazing blog I knew I had to get to it pronto. It is so good and SO refreshing! Zests of orange and lemon, al dente pasta, orange chunks, tiny tomatoes and torn basil all tied together with olive oil and Parmesan cheese. What’s not to love? Must try, whatever time of year it is for you.

I hope you’re having an awesome weekend.
Stay cozy, it’s gonna be a rainy one! xx


Italian Summer Pasta Salad3


Italian Summer Pasta Salad

Recipe scaled down & adapted from A Spicy Perspective

Yield: 2-3 servings | Prep time: 15 minutes | Cook time: 15 minutes | Total: 30 minutes

Ingredients:

  • 2 cups whole wheat Farfalle pasta
  • 1 naval orange, zest and orange segments
  • 1 lemon, zest and juice
  • 2 Tbsp extra-virgin olive oil
  • 1 cup grape tomatoes, halved
  • 1/4 cup scallions, cut into 1 inch segments
  • 1/4 cup torn basil leaves
  • 3 Tbsp shaved Parmesan cheese
  • Salt and pepper

Directions:

  1. Place a large pot of salted water over high heat. Bring to a boil and cook the pasta according to package instructions. Drain the pasta and set aside to cool.
  2. Meanwhile, zest the orange and lemon. Place the zest and the juice of lemon in a large bowl. Add the olive oil and whisk. Peel the orange, gently break the segments apart and seed them. Place them in the bowl.
  3. Slice the tomatoes in half and add to the bowl. Then pour the drained pasta over the tomatoes and gently toss to coat. Add the scallions and basil leaves to the bowl and toss. Salt and pepper generously, about 1/2 tsp salt and 1/8 tsp pepper. Refrigerate until ready to serve.

Note: I didn’t have scallions at hand so I had to skip them but they are highly recommended as it’d add some crunch & make the dish all the more flavorsome. 🙂


Italian Summer Pasta Salad2

5-minute Tomato Pasta Sauce ~ Meal for Two & Some Chit Chat

5-Minutes Tomato Pasta Sauce1


Let’s chat, shall we!? Time to end the lazy slump I’ve been rolling in lately. A lot’s been going on around here and I’m up for a full disclosure now. I did slip the news on Instagram couple of weeks ago but didn’t announce officially on the blog. So here it goes!! Drum-rolls please!!! I am going to LONDON this FALL for a one year postgraduate programme!!!!! WOHOOOO!!!!!!! HOW AWESOME IS THAT?!! Sorry for all the yelling but I’m SOOOOO excited for this new chapter of my life to begin. This year has been truly magical so far!

I got the confirmed offer on my admission about a couple months ago but was skeptical on sharing the news as there were so many things to consider and plan for before I decide to accept the offer. Let’s just say I didn’t want to jinx it! I was ecstatic (to say the least) to get into this prestigious college. I was (still am!) over the MOON would be an understatement. I leave in September and there is so much to do. I need to visit my parents, apply for Visa, do the shopping, pack my bags and off I go. Fingers crossed for a smooth sailing!

Now here is a bit of not-so-good-news. Umm… I’m not sure if I’ll be able to continue blogging along with my studies but I’m not going to incessantly worry over something I can’t control. As of now, the only thing I’m sure of is that the programme is going to be very intense and I am going to have to give my 101% attention to it, even if blogging takes a backseat. I AM absolutely ready to prioritize. I love blogging so much therefore I’ll be blogging here as much as I can until September and after that we’ll see how things go. I would love to pop over in between during my stay in London to share my experiences in new country, food related or not. I will definitely try to stay as active as possible on Instagram nonetheless so do follow me there to stay in touch and be my companion on #LondonDiaries! 🙂

*Recipe*

This recipe I am sharing today is bonkers awesome! It is the quickest meal I have ever made (apart from toss-in-all-you-have salads or couscous!). If you can boil the pasta then you can make this recipe. This one here is basically foolproof! The tomato paste (Brand name – Splitz) I used for this quick pasta sauce is made locally in Bangalore and the ingredients list reads – Tomatoes. That’s it! It does not have any funky ingredients I can’t understand or pronounce, just pure tomato goodness without any color or preservative or salt! Too good to be true and but sadly, it is mostly available only in Bangalore. But fret not. You can go ahead and try any other good, organic tomato paste you can find in the store near you.

This packet is definitely going with me everywhere I travel. I guess it’d be a blessing during my soon-to-start student life! What a cheap, no-fuss and delicious meal option with so many possibilities. Add any number of vegetables to this dish to make it more hearty and fulfilling. Just a heaping Tablespoon of this potent tomato paste is enough for one portion. You can tell I’m quite impressed! What can I say, sometimes simple is truly THE BEST! xx


5-Minute Tomato Pasta Sauce2


Quickest Tomato Pasta Sauce ~ Dinner for Two

Yields: 2 generous servings | Prep time: 2 minutes |Cook time: 15 minutes | Total time: 15 minutes

Ingredients:

  • 2 cups macaroni pasta
  • 1 cup pasta water, reserved after boiling
  • 2 Tbsp olive oil
  • 4-5 cloves garlic, finely chopped
  • 1 small red onion, finely chopped
  • Scant 1/4 cup tomato paste
  • 1 tsp salt or more to taste
  • 1/2 tsp dry basil herb
  • 1/4 tsp freshly cracked pepper
  • Shavings of Parmesan cheese
Directions:
  1. Cook pasta as per the package instructions. Reserve 1 cup of pasta water and drain the pasta.
  2. In the meantime, heat the pan on a medium-high heat. Add olive oil, garlic and onion and sauté for a minute. Add tomato paste and salt and sauté for about 2-3 minutes, scraping and stirring occasionally. The tomato paste will turn brown and this will enhance the flavors. Mix in basil and pepper and cook for another minute.
  3. Stir in 3/4 cup of reserved pasta water to the tomato paste and magically you’ll get your pasta sauce ready! If you want thinner consistency sauce, add remaining 1/4 cup pasta water too. Stir in the drained pasta. Divide between 2 serving dishes. Top with some shavings of Parmesan cheese and fresh basil leaves. Serve immediately.

Notes:
*You can add vegetables of your choice to make the meal more hearty. Just sauté the vegetables along with garlic and onion before adding tomato paste to the mix. Zucchini, broccoli, eggplant, bell peppers…. sky is the limit!
*You may also top the pasta with capers or olives.
*Use whole wheat or quinoa pasta to make this meal healthier. 
*Use penne or spaghetti pasta instead of macaroni.

Leeks, Fennel, Apple + Walnuts Warm Salad

Leeks, Fennel, Apple + Walnuts Warm Salad1


Just popping in to say Hi as it’s been two weeks since we last talked! I am feeling unbelievably lazy and  don’t want to write much so I’ll leave you guys with this quick recipe. I hope you guys’ll understand.

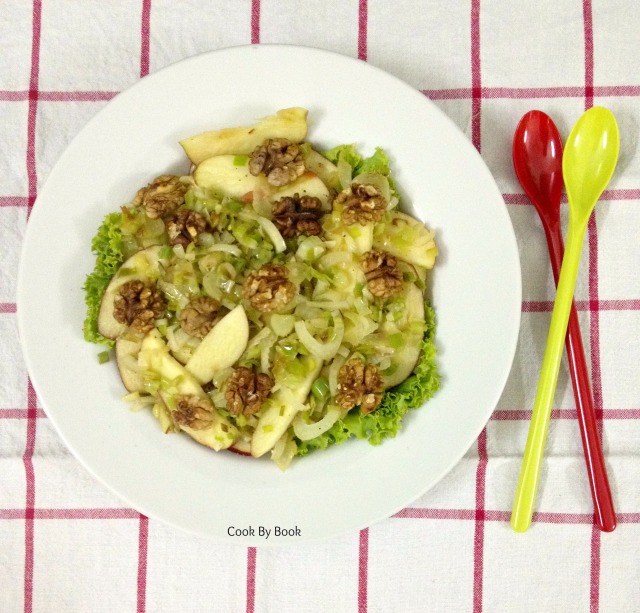
Salads are usually underrated but this one right here is a total stunner. Perfect for spring! It was my first time using fennel in my home kitchen so I was quite excited in terms of what to make with it. I’m a salad person so that is what I wanted to experiment first. The combination of leek, fennel, apple and walnuts works so beautifully and sounds quite exotic but mostly they are all simple, earthy ingredients bound together by a simple dressing. I can’t wait to turn these ingredients in to a soup once the rainy days arrive in full swing(which I hope will be soon!).

Enjoy!
xx


Leeks, Fennel, Apple + Walnuts Warm Salad2


Leeks, Fennel, Apple + Walnut Warm Salad

Serves: as a side for 2/a hearty meal for 1 | Prep time: 10 minutes | Cook time: 10 minutes | Total: 20 minutes

Ingredients:
  • 1 apple, cored & sliced (peeling is optional, I didn’t)
  • 1 + 1 tsp lemon juice, divided
  • 10-12 walnuts
  • 1 Tbsp Olive oil
  • 1 large garlic clove, finely chopped
  • 2 leeks
  • 2 sprigs of fresh thyme, leaves removed
  • 1 fennel, small bulb, sliced
  • 3-4 lettuce leaves
Dressing:
  • 1 Tbsp olive oil
  • 1 and 1/2 Tbsp red wine vinegar
  • 1 tsp lemon juice
  • 1 tsp honey
  • freshly cracked pepper, to taste
  • salt, to taste

Directions:

*Preparing Leek : Cut the ends off the leek and discard. Quarter the leek lengthwise, wash under running water to remove all the grit and cut them into slices.
*Preparing Fennel : Check this easy tutorial on The Kitchn

  1. Wash, core and slice an apple. Toss with 1 tsp of lemon juice to prevent discoloration and set aside.
  2. In a fry pan, add the walnuts and toast them on a medium-low heat until fragrant. Set aside.
  3. In the same fry pan, heat the oil over medium heat. Add garlic, leeks and thyme leaves to the pan and sauté for about 3-4 minutes stirring occasionally. Add sliced fennel, cook for another minute or so and remove it from the heat. Immediately stir in sliced apples and splash remaining 1 tsp lemon juice.
  4. In a small jar, add all the ingredients for the salad dressing. Close the lid tightly and shake the jar vigorously until completely combined. Pour the dressing over the salad and toss.
  5. In a serving plate, make a bed of lettuce leaves and top with salad. Garnish with toasted walnuts. Serve immediately.

L.O.V.E. Wraps

L.O.V.E. Wraps1


I know you think that my blog has sort of turned into a baking blog with a savory recipe seldom thrown here and there which again involves some sort of baking! (Humph.. Do I make sense?) So after throwing so many sugar-laden desserts week after week, I thought a savory recipe for brunch or breakfast (which does not involve baking) would be a great way to redeem my past actions. And when the recipe is so healthy, no-carb and wholesome, I’m sure many of you’ll be ecstatic.

With this recipe, turn your regular scrambled egg breakfast into a fancy brunch dish. With summer upon us, we require as many quick-fixes as possible. I mean, who wants to turn on the oven or spend time in the kitchen slogging over the heat! Low-fat and clean eating becomes a necessity when days are so hot and humid. This recipe absolutely fits the bill as an all-rounder meal suitable for breakfast, brunch, lunch and dinner.

This dish is so colorful because of zucchini, carrots and broccoli. As for the recipe, these are the measurements I followed but this dish does not require following a recipe to the T so feel free to make any adjustments. Use whatever vegetables you have at hand. Go vegetable crazy! Bell peppers and beans would be quite awesome too.

So eat light & have a happy happy weekend!
xo


L.O.V.E. Wraps


L.O.V.E. Wraps

Serves: 2 | Prep time: 10 minutes | Cook time: 10 minutes | Total: 20 minutes

Ingredients:

  • 1 Tbsp Olive oil
  • 2-3 cloves of garlic, finely chopped
  • 1 small onion, finely chopped
  • 1 small head broccoli, cut into florets
  • 1 small carrot, cut into julienne
  • 1 small zucchini, cut into julienne
  • 1/8 tsp red chili flakes
  • 1/2 tsp Italian seasoning (or any seasoning of your choice)
  • 1/2 Tbsp butter
  • 2-3 large eggs
  • 1 Tbsp milk
  • salt and pepper, to taste
  • 4-6 lettuce leaves, washed and dried (any lettuce of your choice is fine)

Directions:

  1. In a skillet, heat 1 Tbsp oil over medium heat. Add garlic and onion to the skillet and saute till golden brown for about 2-3 minutes.
    Add broccoli and carrots and saute for another minute.
    Add zucchini and cook until just warm. We want the vegetables to have crunch and not be mushy. Mix in red chili flakes, Italian seasoning (or seasoning of your choice) and season with salt and pepper. Place this mixture in a small bowl.
  2. Wipe the skillet (used to saute vegetables) with paper towel and heat 1 Tbsp butter in it over medium heat. In a mixing bowl, crack 2-3 eggs and whisk them together with milk until well-beaten. Add pinch of salt and plenty of pepper.
    Tilt the skillet to ensure the entire pan is coated in the melted butter and pour in the eggs. Keep the heat on medium low. When the eggs just start to set, use a flat spatula to slowly scrape sections of eggs, creating folds. Scrape occasionally until the eggs form soft folds; turn off the heat just before they are fully hardened.
  3. To serve, place the scrambled eggs on a lettuce and top with onion and vegetable mixture.

‘Breakfast For Two’ ~ Savory Pear & Apple Dutch Baby

Savory Pear & Apple Dutch Baby1


Good Morning & Happy Valentine’s Day ♥ Friends!

Roshni & I are back with our second installment of monthly cook-off. Keeping today’s lovey-dovey holiday in mind, the theme was a no-brainer – ‘Breakfast for Two’. So if you’ve still not thought of V-day breakfast for your sweetie then let us come to your rescue. I come bearing freshly baked savory German Pancake. Convenient without having to stand flipping pancakes on stove one by one and ready in 30 minutes! Slide it in the oven, go about your work (make coffee or arrange breakfast tray) and after 20 minutes, poof!, breakfast is served. No burnt sides too! 😉

Blogosphere is scattered with chocolates, berries and sprinkles for the occasion. Red and pink is so much in the air! I joined  the  bandwagon  too but if you’re not into sweet stuff then this recipe is just perfect for you.


Savory Pear & Apple Dutch Baby2


Pear, apple, some leeks and smoked Gouda… The fruit is cooked in a pan with some butter and thyme. Heavenly smell to wake up to, if you ask me! The fruit is then arranged in cast-iron skillet or baking pan. Egg and flour mixture is poured over the fruit followed by cheese. The prep requires mere 10 minutes of time and then whole business is taken care of by your beloved oven. It is baked until golden for about 20-25 minutes. Cut into wedges and serve immediately.

This dutch baby is perfect as a Brunch/Brinner too and should be made on any day, not only on V-day. Make this NOW & thank me later. If you want to make a sweet dutch baby, then try this recipe of mine. And now go to Roshni‘s blog for a great ‘Breakfast For Two’ idea! Let’s check out what she has in store for us all! 🙂

Have a great day all you happy lovers out there! ♥ ♥ ♥

Savory Pear & Apple Dutch Baby

Serves: 2 | Prep time: 10 minutes | Cook time: 20-25 minutes | Total time: 30-35 minutes

Ingredients:

  • 2 Tbsp butter (salted works too)
  • 2 Tbsp leeks, washed & thinly sliced
  • Half pear, peeled, cored & sliced
  • Half green apple, peeled, cored & sliced
  • few sprigs of thyme
  • 3 large eggs
  • 1/2 cup all-purpose flour
  • 1/2 cup milk
  • Salt, to taste
  • 1/4 tsp lack pepper (or more)
  • 1/2 cup grated smoked Gouda cheese

Directions:

  1. Preheat the oven to 210ºC / 425ºF.
  2. Heat a small pan on a medium heat and add 1 Tbsp of butter to it. Once butter has melted, add leek, pear, apple slices and thyme leaves to the pan and let cook on a medium heat for about 3-4 minutes stirring occasionally. Set aside.
  3. Mix the eggs, flour, milk, salt and pepper in a blender on a medium speed until just blended, 5-10 seconds.
  4. Add rest of the 1 Tbsp butter in to a 9-inch cast-iron skillet/baking pan and put it in the oven. Wait until the butter has melted completely and sizzling then carefully take the pan out and swirl the butter around coating the pan completely.
  5. Spread the cooked mixture of leek, fruits and thyme to the bottom of the pan. Pour the egg mixture on top. Finally, sprinkle the cheese all over and slide it back into the oven to be baked for 20-25 minutes, until slightly browned on top. Cut the dutch baby into 4 or 6 wedges and serve immediately.

‘Light & Healthy’ ~ Whole Wheat Thin Crust Pizza Dough

Whole Wheat Thin Crust Pizza Dough2

You all remember, we had so much fun swapping cookies during the food blogger cookie swap last year(that was last year??! Humpph..). So, this new year my dear friend Roshni from The Vanilla Bean and I wanted to start something new on our blogs.

After exchanging multiple e-mails, Cook-Along sessions sounded like a brilliant idea to both of us! Yes, we stay in different cities so how exactly do we plan on doing this? Lemme explain. Every month we’ll select a theme and plan a lunch/dinner-dessert menu based on it. After selecting who cooks what cooking will happen in our respective kitchens and on 15th of every month we both will post the recipes and link them. This way you get to enjoy 2 recipes! Total win-win 🙂

Going with the season of new-year resolutions, this month’s theme was a no-brainer. ‘Light & Healthy’ it is! I chose to make lunch/dinner so Roshni chose to prepare a dessert. So get ready as it’s show-time! 🙂

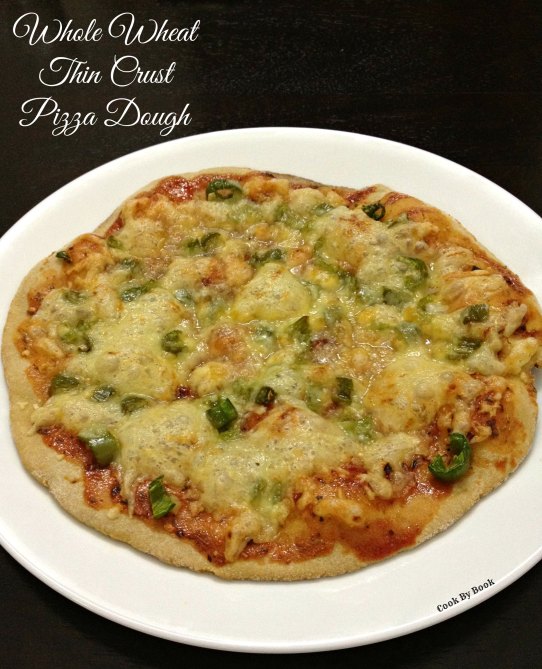
I have a pizza dough recipe for you today. And trust me when I say this, you NEED this recipe in your life. I conquered my fear of working with yeast last year and made these amazing Strawberry Sweet Rolls. The next thing I on my list was making pizza dough using whole wheat flour. It had to be a thin-crust pizza as I love my pizza that way. I started looking for the recipes which did not use sugar and hit jackpot with this fool-proof recipe! I doubled the recipe and did little adjustments. The results were stellar!

You must be thinking why am I putting the pizza in a healthy and light category? When topped with fresh vegetables and minimal quantity of cheese or the toppings coated with low-fat cream cheese can definitely turn it into a more well-rounded and nutritious meal. This version is anytime lighter than the ordered stuff!

So wait no more and make the pizza your way at home! 🙂

Whole Wheat Thin Crust Pizza Dough1

Whole Wheat Thin Crust Pizza Dough3

Topping of Jalapeno & Cheese

Whole Wheat Thin Crust Pizza Dough4

Topped with cherry tomatoes, onions and cheese

Whole Wheat Thin Crust Pizza Dough

Makes: 2 12-inches or 4 6-inches crusts | Prep time: 15 minutes | Resting: 1-2 hours

Recipe adapted from sugarfreemom.com

Ingredients:

  • 3 cups whole wheat flour, plus more for dusting
  • 1 tsp salt
  • 4 tsp instant dry yeast (I’ve used Gloripan)
  • 4 Tbsp extra virgin olive oil
  • 1 cup warm water (around 55ºC/110ºF)
  • 2 Tbsp honey

Directions:

  1. Fit the dough hook attachment to your stand mixer. In the stand mixer bowl, combine flour and salt. Make a well in the center of the dry ingredients.
  2. In a separate small bowl mix oil, honey, warm water. Add yeast and stir gently with a spoon, tillyeast dissolves. Let it sit for about 7-8 minutes until you see some foam form from the yeast.
  3. Pour the wet mixture into the dry ingredients and mix until well combined at setting 2 for about 2-3 minutes.
  4. Once combined change to your dough hook and keep setting at 2 and let the machine go for about 8 minutes or knead by hand for 10 minutes.
  5. Remove your dough and place into a bowl greased with oil. Cover with a towel and let rise for at least one hour.
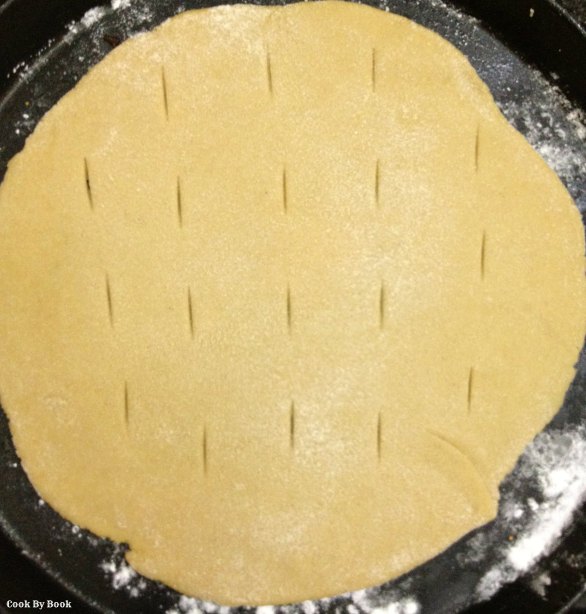
  6. Once risen, knead by hand for a minute or so and spread dough by hand onto a baking sheet sprayed with oil and dusted with flour or use a rolling pin.
  7. Add your choice of toppings and bake in a 400ºF/200ºC preheated oven for 15-20 minutes until crust is golden brown.
*If you don’t own a stand mixer, you may knead the dough by hand.
Now hop on to Roshni’s blog for a fabulous Zabaglione recipe!

Skinny Zucchini & Mushroom Soup

Skinny Zucchini & Mushroom Soup1
I am so stressed nowadays.. And the reason for all the stress is not real life.. But internet life.. I know I haven’t been posting much but I have been lurking around and appreciating what all the food bloggers are up to. All over the internet I am seeing incredibly delicious holiday food..
Christmas IS actually upon us!!! Oh my gosh! I mean where DID November go?! I mean where did the year 2013 go? I am still trying to wrap my mind around this reality and meanwhile December is already slipping away at a lightening speed. Looks like everyone is ready for it but me. Web is getting bombarded with countless uhh-mah-zing fudge and truffle recipes. Peppermint and chocolate is in the air! Red and green are ruling! And all I have got to post today is SOUP!
I mean don’t get me wrong… I totally adore soup! The temperature is fluctuating constantly around here so it is perfect for the season! This light and skinny soup is so easy to make just like all the other recipes I post over here. One pot meal = happiness!
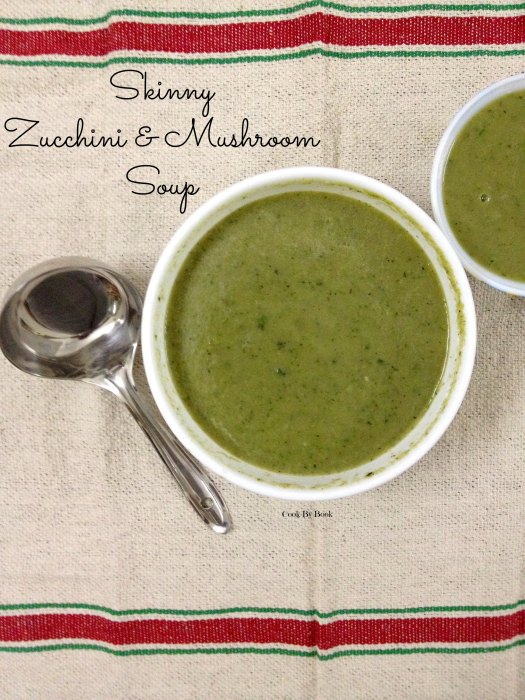
I know zucchini season is over for most of you out there but we’re still getting enough of it here. Pair it with earthy mushrooms and you get a thick, silky, creamy consistency soup without even adding any cream to it. Thyme lends a beautiful depth of flavor. And another advantage is that no vegetable stock is required for this soup! Yes!! Water works just fine & you won’t even miss the stock.. win-win 🙂
Give me a mug of this cozy soup with garlic bread and I am in heaven!
Skinny Zucchini & Mushroom Soup2
Skinny Zucchini & Mushroom Soup
Serves: 3 | Prep time: 5 minutes | Cooking time: 15-20 minutes | Total time: Under 30 minutes
Ingredients:

  • 1 Tbsp margarine (Olive oil can be substituted)
  • 1 medium onion, chopped
  • 2 garlic cloves, crushed
  • 300 gm (2 small) zucchini, roughly chopped
  • 200 gm / 7 oz mushrooms, roughly chopped
  • Few sprigs of fresh thyme
  • Salt and pepper, to taste
  • 2 cups water

Directions:

  1. Heat the skillet on a medium heat and add margarine to it. Sautè onions and garlic cloves on a low heat till pink and translucent.
  2. Add zucchini, mushroom and thyme sprigs to the skillet and sautè till cooked for 10 minutes. Add 1 cup of water to it and let it boil. Turn off the heat.
  3. Remove the thyme sprigs and puree using a hand blender/food processor. Add this puree and another cup of water to skillet and let it come to boil. Season with salt and pepper. Adjust the consistency of the soup by adding more water if needed. Serve hot!

*Serve it with shredded Parmesan for a cheesy kick!

Skinny Zesty Salad

Skinny Zesty Sala1


After hogging lots and lots of sweets and fried stuff during 5 days of festivities in the past week, believe it or not, but my digestive system needed a break. So I am doing a cleanse/detox for few days.

I made this skinny salad for lunch one day and have fallen in love with it since then. It is so versatile, protein-packed and healthy even for people with diet restrictions. Yes! It is suitable for all the vegetarians and vegans out there! A complete meal in itself.

Add any or all of the ingredients mentioned below or whatever you have in your refrigerator. Don’t like uncooked Paneer/tofu? Don’t worry! You can grill it with a bit of olive oil and some seasoning before adding it to your salad or skip it. I once made this with just apple, pear, pomegranate and it was still lip-smacking!

So do your body a favor, give yourself a break from cooking and make this hearty salad! 🙂

Skinny Zesty Sala2

Skinny Zesty Salad

Serves: 2 as a side and 1 as a main-course

Ingredients:

  • 1/2 Tbsp extra-virgin olive oil
  • 3-4 cloves of garlic, finely chopped
  • 1 cup broccoli florets
  • 200 gm Paneer/extra-firm tofu, cut into 2 inch-long thin strips
  • 1 small red bell pepper, chopped into thin strips
  • 1 small yellow zucchini, cut into semicircles
  • 1 small apple, thin slices
  • 4 Tbsp black olives
  • Bunch of lettuce
  • few sprigs of parsley, finely chopped

For dressing:

  • 2 Tbsp extra-virgin olive oil
  • 3 Tbsp white wine vinegar
  • Juice from 1 lemon, or more to taste
  • Zest of 1 lemon
  • Salt and pepper, to taste

Directions:

  1. Heat a small pan on stove and add 1/2 Tbsp oil to it. Add garlic and broccoli florets. Stir fry till cooked, approximately for 4-5 minutes. Be careful not to burn garlic. Set aside.
  2. In a small bowl, mix all the ingredients for dressing.
  3. In a medium bowl, add stir-fried garlic and broccoli florets. To this, add prepared paneer/tofu, bell pepper, zucchini, apple and black olives. Pour dressing over it and toss nicely.
  4. In a salad serving bowl, arrange lettuce at the bottom. Add salad on top. Sprinkle with chopped parsley and serve immediately*.

*If serving later, refrigerate the salad and add apple just before serving.

Oven Roasted Asparagus & Potatoes with PeanutButter & Buttermilk Dressing

Oven Roasted Asparagus & Potatoes with PeanutButter & Buttermilk Dressing4
Past 10 days were a blur at our house.. Between Karva Chauth party and my girl gang gathered at the house for the wedding, I hardly had time to squeeze in a blog-post. Those were such good days and in all honesty, I didn’t want them to end! Exciting times filled with fun, laughter and so much joy!! I’m going to cherish the precious memories of this time spent with friends and family forever. Moments like these is what makes our life worthwhile.
Between all the festivities of the past weekend and coming weekend, I am doing a detox of my own with fruits, soups, stir-fries and salads. Gearing up for the next big weekend, you see! You won’t believe how many great recipes I have lined up for you all! But before that enjoy this humble dish which truly deserves a place in your repertoire! 🙂
Oven Roasted Asparagus & Potatoes with PeanutButter & Buttermilk Dressing2
Today’s recipe is simple but totally lip-smacking.
I mean it has potatoes & peanut butter in it so of course! 😉
Just some roasted veggies with healthy yet delicious dressing. Perfect for the ‘touch of cold’ weather we are experiencing here.. It is great as a side dish or as a whole meal in itself.. I had it for dinner and could not finish it entirely. The recipe can easily be doubled, tripled or quadrupled as per your needs. I used regular potatoes but baby potatoes would be amazing too!
Oven Roasted Asparagus & Potatoes with PeanutButter & Buttermilk Dressing3
Roasted Asparagus & Potatoes with Peanut Butter & Buttermilk Dressing
Serves: 2 as a side-dish or 1 as a lunch/dinner
Ingredients:
Roasted vegetables:
  • 4 small potatoes, cut into 1-inch cubes or 12 baby potatoes, halved
  • 20 spears of asparagus cut into 5-inch pieces, hard woody ends discarded
  • 1 tsp olive oil
  • Salt & pepper, to taste

Dressing:

  • 4 Tbsp buttermilk
  • 1 Tbsp + 1/2 tsp crunchy peanut butter
  • 1/4 tsp honey
  • 1/4 tsp red chilli flakes
  • 1/2 tsp lemon juice
  • salt & pepper, to taste

Directions:

  1. Preheat the oven to 200ºC/400ºF. Arrange prepared potatoes and asparagus on the baking tray. Sprinkle with oil, salt and pepper and toss together. Let it bake in the oven for 10-12 minutes. Remove the asparagus from baking tray and return the tray to oven. Let the potatoes bake for another 15 to 20 minutes till fork-tender.
  2. In a small bowl, mix together all the ingredients for the dressing.
  3. Serve the roasted vegetables smothered with the dressing.

Enjoy!!

Baked Orzo with Spinach, Corn & Asparagus

Baked Orzo with Spinach, Corn & Asparagus1
Okay, I have a pattern. On this blog. I write either about desserts or pasta here. I have a proof. But what can I say?! They are two of my favorite things. The weather here is not helping the matters either. This rainy, gloomy weather forces me to switch on the oven almost everyday! It makes me add cinnamon to every sweet stuff I bake so that the house smells like Fall. I am craving soups and wearing cardigan while going out. Gosh, how I am in love with the weather right now!!
You guys know I am all for skinny dishes. But that does not mean I do not like eating overloaded cheesy goodness. In fact, I LOVE it so much but just NEVER make it. I can’t bring myself to add a pound of cheese to any dish knowingly. Period.
Baked Orzo with Spinach, Corn & Asparagus2
This dish here is in no way skinny. But not unusually loaded either. Something in between. A dish I would dive in. It is everything I had hoped and dreamed for in baked pasta. There’re pillows of corn and asparagus throughout. There are decadent, gooey cheese pulls stretching from every forkful. And it is easy. Yes, as easy as this simple mac-n-cheese I know how to make. So make it NOW as there is no reason to keep yourself away from such a bliss.
Baked Orzo with Spinach, Corn & Asparagus
Serves: 2
Ingredients:

  • 1/2 cup Orzo, a rice shaped pasta
  • 1/2 cup corn kernels
  • 8-10 spears of asparagus cut into 1-inch pieces, hard/woody ends discarded
  • 1 Tbsp olive oil
  • 5-6 shallots, finely chopped
  • 2 garlic cloves, minced
  • 1 stalk of celery, finely chopped
  • 2 Tbsp tomato pest
  • 1/2 cup spinach leaves, packed, roughly chopped
  • 3 Tbsp Parmesan cheese, shredded
  • 1/3 cup Mozzarella cheese, small cubes of 1/2 cm
  • salt, to taste
  • freshly ground pepper
  • 1/4 tsp oregano flakes
  • 1/4 tsp red chili flakes
  • 1/2 tsp lemon zest
  • 1/2 cup reserved pasta water

Directions:

  1. Preheat the oven to 180ºC / 350ºF. Boil a pot of water with generous sprinkle of salt. Add Orzo, corn kernels and asparagus to the boiling water. Let it boil for 2 minutes and after that save 1/2 cup of water. Drain Orzo, corn kernels, asparagus and set aside.
  2. Simultaneously heat a large frying pan over medium-high heat. Add oil to the hot pan and once oil is shimmering, add the shallots, garlic and celery. Cook for 3 minutes or so till shallots turn translucent. Add tomato paste, Orzo, corn kernels, asparagus and cook for 3 more minutes. Off the heat. Immediately mix-in spinach leaves.
  3. Add Parmesan, Mozzarella, salt, pepper, oregano, red chilli flakes, lemon zest and pasta water and mix well.
  4. Transfer mixture to a small oval or 6×6-inch square ovenproof baking dish. Cover with foil and bake for 15 minutes, then bake for 15 minutes without the foil. (You can change ratio of foil-on to foil-off time as per your preference for crunchy pasta lid.) Let rest for 5 minutes before serving.

Notes:

*You can use whole-wheat Orzo or replace Orzo with any other small-sized pasta.
*I used pasta water and did not feel that the dish was lacking in flavor at all. But if you do not like using water then use vegetable stock.