2-Layer Rose Coconut Cake

RoseCoconut-2

Spring is a time for rebirth and renewal, a time for change. I decided make a change this year with finally reviving this space of mine (yeah, not that profound I know) and in a world where we hardly have control over anything, changing up this little thing makes me super super happy. We have so much to catch up on and gazillion delicious recipes coming your way! But first, THIS! ☝

So end of last year, I bought myself a set of 6-inch cake pans and these are game changers (should have got them sooner!). Small batch baking has always been my thing (here, here and some more) so the smaller size pans were way overdue. I have baked at least 7 layer cakes in these not-so-new-pans-anymore this past 3 months (not hard to believe right?!). It’s just 2 of us in the house and I do like to eat everything I make (you bet it shows) hence small batch baking wins big time in my book so this was definitely long time coming. Not that we I need any occasion to eat cake around here but guys, these 6-inch layer cakes are so very perfect for small gatherings. Not to mention but they look so dang cute. If you are baking for more people then no problem. Just double the recipe and make 4-layers instead, tall cakes are in and they are here to stay! Well, you certainly don’t need to wait for any gathering to make this one right here. It can totally be you+couch+fork situation, demolishing the whole thing by yourself. Believe me, you would want to!

RoseCoconut4

So let’s talk about this particular cake here. This elegant looking, mildly flavoured, rose scented cake. The flavours will totally make you reminisce about the sweet smell of rose garden. The minimalist, semi-naked look is pristine for the spring season and is bound to make any brunch-table look chic and gorgeous. I have paired three different flavours for this cake but none overwhelms the other and are rather in complete harmony, even complimenting each other. Rose, coconut and cardamom seems to be a match made in spring heaven. So lush! I hope you enjoy this cake as much as we did!

RoseCoconut3

2-Layer Rose Coconut Cake

Prep time: 20 minutes | Bake time: 20 minutes | Total active time: 40 minutes

Ingredients:

  • 1 cup all purpose flour
  • 1/2 Tbsp baking powder
  • 1/4 tsp ground cardamom
  • Pinch of salt
  • 3 Tbsp unsalted butter, softened at room temperature
  • 1/2 cup caster sugar
  • 1/2 tsp vanilla extract
  • 1/2 tsp rose extract or 1 Tbsp organic rose water
  • 1 large egg, room temperature
  • 1/2 cup coconut milk, room temperature

Coconut Buttercream Frosting:

  • 1/3 cup unsalted butter, softened at room temperature
  • 4 Tbsp coconut milk, refrigerated
  • 1 cup confectioners sugar
  • Pinch of salt
  • 1/4 tsp rose extract
  • 1/4 tsp coconut extract (optional)

Directions:

  1. Grease 2 6-inch round cake pans with flavourless oil and line the bottom with parchment paper. Preheat the oven at 180°C/350°F.
  2. In a small bowl, sieve all purpose flour, baking powder, ground cardamom and pinch of salt. Give it a whisk.
  3. In another mixing bowl, cream together butter and sugar until light and creamy. Add vanilla extract, rose extract, egg and whisk very well until incorporated.
  4. Now whisk in dry ingredients to wet ingredients alternating with coconut milk in 3 additions, beginning and ending with dry ingredients. Be careful not to overmix.
  5. Divide the batter in to the cake pans and bake for 20 minutes or until toothpick inserted in the center comes out clean. Let it cool on wire rack for about 5 minutes before demoulding. Let the cakes cool completely on wire rack and meanwhile get on the frosting.
  6. Coconut Buttercream Frosting: In a mixing bowl, cream together butter and coconut milk using electric mixer until smooth. With the mixer on low-speed, add confectioners sugar and salt and beat until just combined. Once incorporated, turn up the speed to medium-high and beat until fluffy (about 5 minutes). Adjust the sugar until your desired consistency achieved. Briskly whisk in rose extract and coconut extract (for like 10 seconds).
  7. Assembly: Once the cakes are completely cool, place one layer of the cake onto the serving plate (bottom side up). Spread about 3 Tbsp of frosting on this layer, spread it uniformly and top it with the second layer (bottom side up). Spread about 2 Tbsp of frosting on top, spread uniformly and crumb coat the sides. Let the cake rest in refrigerator for about 15-20 minutes. Frost with the remaining buttercream frosting and decorate as desired. I topped mine with fresh figs and fresh strawberry slices. The cake stays fresh for 4 days, stored in an air-tight container in the refrigerator.


RoseCoconut1

Zesty Peaches & Cream Mini Bundt Cake

Zesty Peaches & Cream Mini Bundt Cake1

Hiya.. I hope you all had a wonderful Independence Day long weekend. Ours was relaxed and lazy and juust perfect. Monday was tough indeed. Today was only bearable because I had this cake in my life. First bite into it and I instantly regretted making a mini version because this was over in seconds!! So to save you from regret I suggest you double the following recipe and make 2 mini bundts! 😉

The combination of orange, peach and cream cheese is blow-your-mind-off-amazing! This mini bundt is supremely moist unlike the dry, crumbly pound cakes we all dread. It turns into a piece of heaven drizzled with the vanilla glaze. Isn’t this mini size so cute! Give this a go before the peach season officially ends.

Enjoy & eat it all up! 🙂


Zesty Peaches & Cream Mini Bundt Cake4


Zesty Peaches & Cream Mini Bundt Cake

Yields: 1 6-inch bundt | Serves: 6 | Prep time: 15 minutes | Bake time: 30 minutes | Total time: 45 minutes

Ingredients:
For Cake:
  • 1/4 cup peach cubes (about 1 medium /2 small peaches, peeled & pitted)
  • 1/2 Tbsp all-purpose flour
  • Zest of 1 Naval orange
  • 1/3 cup sugar
  • 1 large egg
  • 1/4 cup unsalted butter, at room temperature
  • 2 Tbsp cream cheese, at room temperature
  • 2 Tbsp freshly squeezed orange juice
  • 1 tsp vanilla extract
  • 1/2 tsp orange extract
  • 1/2 cup all purpose flour, sifted
  • 1/2 tsp baking powder
  • Pinch of salt

For Glaze:

  • 4 Tbsp powdered sugar
  • 1 tsp vanilla extract
  • 1 tsp milk or cream (add more to adjust the consistency)

Directions:

  1. Preheat the oven at 160°C / 325°F. Grease 6-inch mini bundt pan with oil/butter. Set aside.
  2. Put the prepared peach cubes in a bowl. Sprinkle the peach cubes with all purpose flour. Stir lightly, just until peach cubes are coated with the flour.
  3. In a medium mixing bowl, add orange zest and sugar and rub it together with your fingers to release the natural oils from the zest. Add butter and egg to the bowl. Cream together butter, egg, sugar & zest with the whisk or using hand held mixer. Whisk in cream cheese, orange juice, vanilla and orange extract. Slowly and carefully, mix in all purpose flour, baking powder and salt. Do not overmix.
  4. Fold in the prepared peach cubes to the cake batter and pour the batter in the prepared bundt pan. Bake for 26-28 minutes or until the toothpick inserted in the center comes out clean. Let the cake cool in the bundt pan for 5 minutes before inverting on a cooling rack to cool completely.
  5. For glaze: Combine powdered sugar, vanilla extract and milk, adding a teaspoon of milk at a time until glaze reaches desired consistency.


Zesty Peaches & Cream Mini Bundt Cake2

National Doughnut Day!!! #RecipeRoundUp

Whether you prefer doughnut over donut or fried over baked doesn’t really matter, because these glazed, filled, sprinkled, and all around glorious treats are uh-mah-zing no matter what you call them or how you make them! In honor of National Doughnut Day today, I’m sharing some of my favorites (which are all of them!) from the archives.

So, take out your donut-pans and get your sweet donut craving on!
Go get baking! 🙂

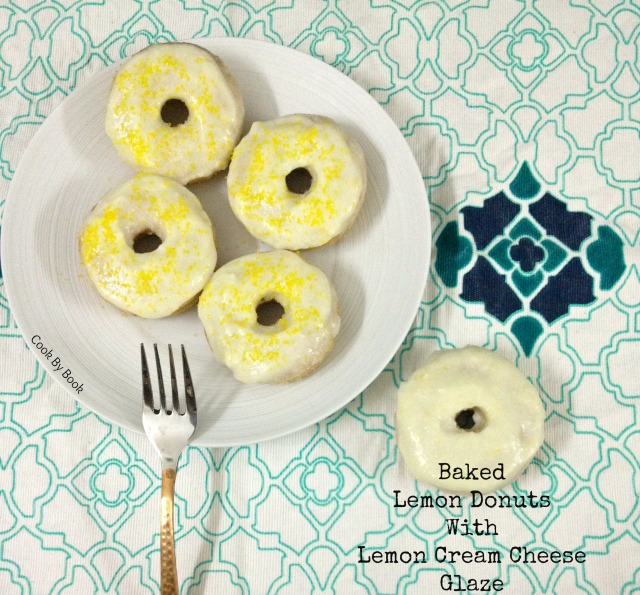
Baked Lemon Donuts with Lemon Cream Cheese Glaze1

Baked Lemon Doughnuts with Lemon Cream Cheese Glaze

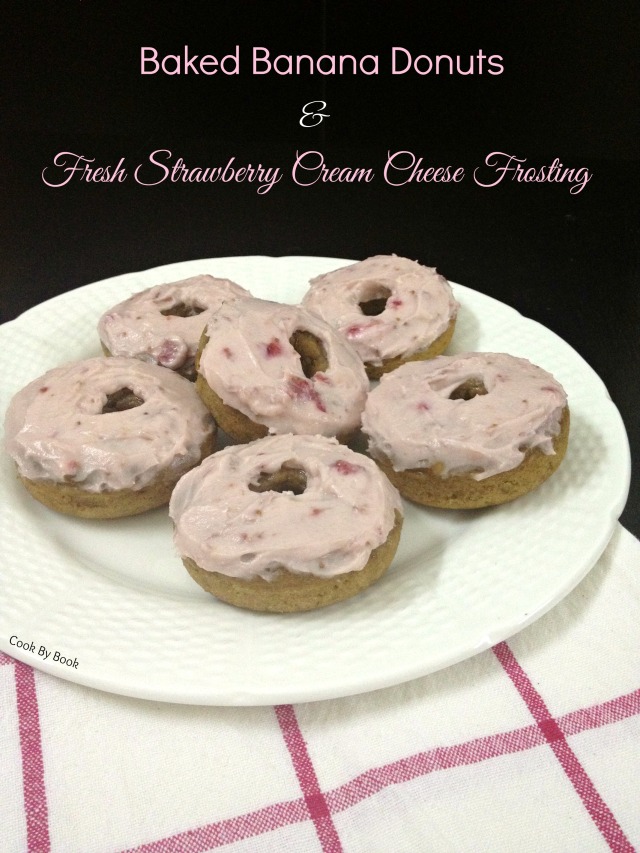
Banana Donuts1

Baked Banana Donuts & Fresh Strawberry Cream Cheese Frosting

Red Velvet Cake Donuts2

Red Velvet Cake Donuts

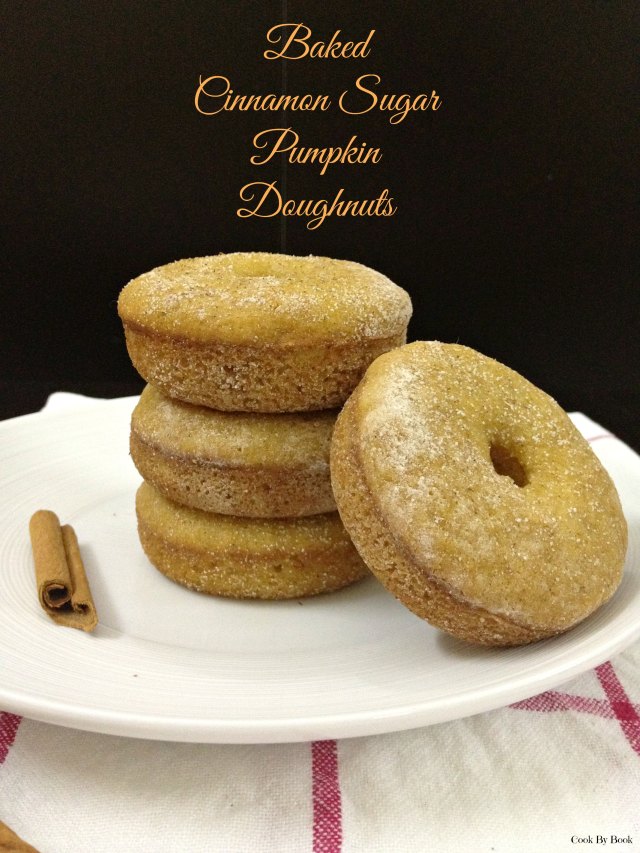
Baked Cinnamon Sugar Pumpkin Doughnuts2

Baked Cinnamon Sugar Pumpkin Doughnuts

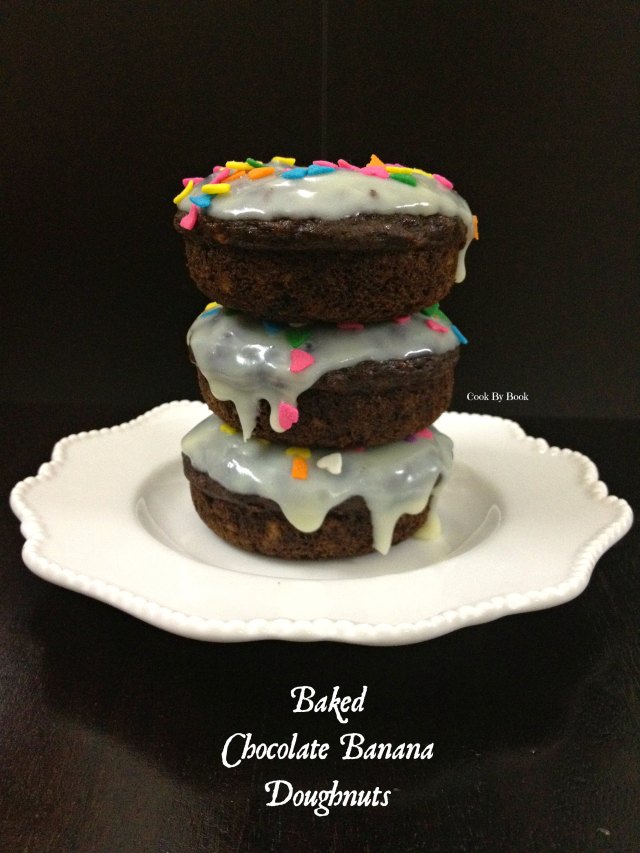
Baked Chocolate Banana Doughnuts1

Baked Chocolate Banana Doughnuts

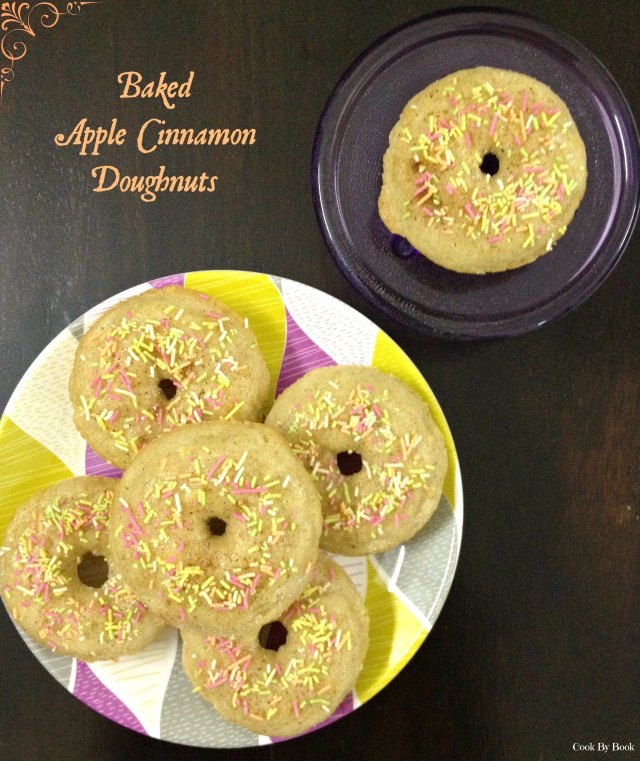
Baked Apple Cinnamon Doughnuts1

Baked Apple Cinnamon Doughnuts

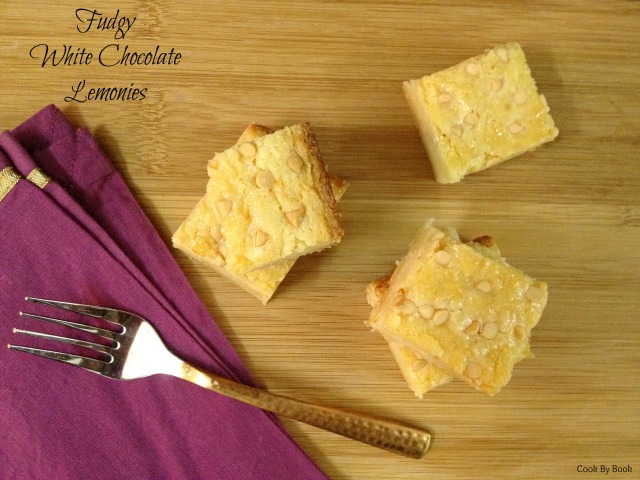
Fudgy White Chocolate Lemonies {Lemon Brownies}

Fudgy White Chocolate Lemonies1


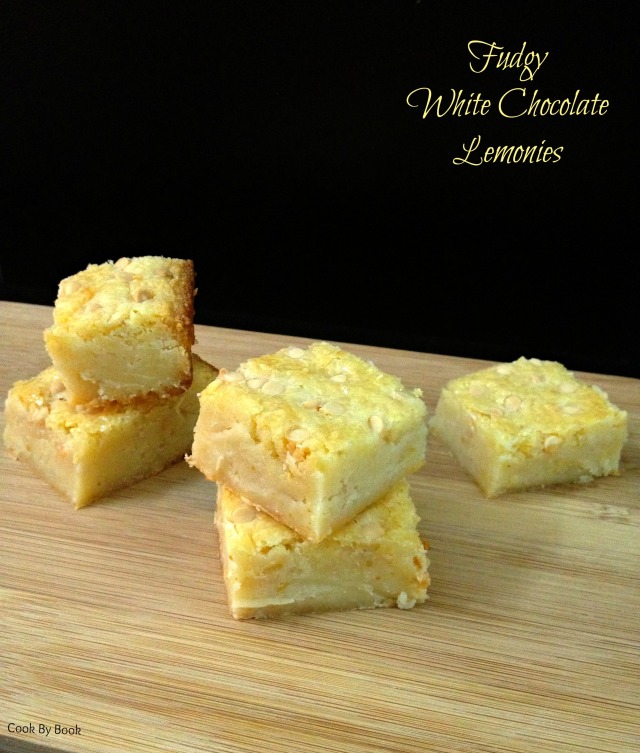
Lemonies… It sounds so exotic and poetic. Some genius thought of this cool name for lemon brownies, I am not sure who did but genius, nonetheless! A simple reason for not calling them brownies has something to do with their color (They are not brown!!). These are pale yellow beauties adorned with bright yellow zest and white chocolate chips in each bite. They are so fudgy and buttery, dense yet light, just how I like my brownies.

These are the perfect treats for summer (or round the year, who am I kidding!?!) and totally irresistible. The lemon flavor really shines through and pairs wonderfully well with all that white chocolate. Be sure to use a white chocolate bar and not white chocolate chips for the batter. It makes all the difference! And have them chilled, straight from the fridge. You’re welcome. 🙂

Have a fun weekend!
xx


Fudgy White Chocolate Lemonies2


Fudgy White Chocolate Lemonies {Lemon Brownies}

Yields: 12-16 slices | Prep time: 15 minutes | Bake time: about 35 minutes| Total: 50 minutes
Ingredients:

  • 9-oz block of white chocolate, roughly chopped
  • 3/4 cup unsalted butter, at room temperature
  • 3/4 cup granulated white sugar
  • 1 Tbsp lemon zest
  • 2 large eggs, at room temperature
  • 1/4 cup freshly squeezed lemon juice
  • 1 cup + 1 Tbsp all-purpose flour
  • 1/8 tsp salt
  • 2 Tbsp white chocolate chips, to sprinkle on top (optional)
Directions:
  1. Preheat the oven to 180ºF / 350ºC. Grease an 8×8-inch square pan; line base and sides with parchment paper and grease with butter/oil (I used foil).
  2. In a large microwave-safe bowl, melt chocolate and butter in a microwave for 1-2 minute, stirring every 30 seconds. The mixture should be lump-free and glossy. Rub lemon zest and sugar together with the fingers and whisk in to the chocolate mixture. Set aside and let cool for about 5 minutes.
  3. Once chocolate mixture is cooled down, whisk in eggs (one by one) and lemon juice until well combined.
  4. In a separate bowl, sift together flour and salt and fold into chocolate mixture with wooden spoon or rubber spatula until just combined. Pour the batter in a baking pan, sprinkle chocolate chips on top (optional) and bake for 33-35 minutes until the toothpick inserted in the center comes out clean or with a few moist crumbs. Let cool completely in pan over a cooling rack. (If you’re in a hurry, throw it in a refrigerator or freezer for a while for easy cutting.)
  5. Lift up the ends of parchment or foil liner, transfer the brownies to cutting board and cut into 9 or 12 squares. Store it covered in an air-tight container for a week in refrigerator. It tastes best chilled.

Baked Lemon Doughnuts with Lemon Cream Cheese Glaze ~ Eggfree

Baked Lemon Donuts with Lemon Cream Cheese Glaze1


Hello folks! April went by at a lightening speed. It was a total blur. A beautiful blur at that. Yes, I absconded again for the latter part of April. Well, I hope you didn’t miss me much. Sorry to say but I didn’t miss you guys one bit. Here is why. These past days were spent with my most beautiful angelic cutie pie tiny-little-peanut-sized-newborn-niece. She turned 12 days today. We feel so blessed to have her in our lives and welcomed her in to this world with lots of snuggles and baby talks. We immediately named her Cherry (lovingly, of course!) because trust me when I tell you this, she looks just like a ruby red cherry. She is such a doll, so adorable, so so precious. All the sleepless nights spent in soothing her back to sleep were totally, absolutely worth it. I’m back home now and miss her so so much.

The moment I returned home, I had to bake. To celebrate. I instantly thought donuts! I mean, come on, donuts=celebration. Summer is not treating us Bangaloreans well this year and lemons are always on my mind. Big, plump, juicy, organic, tart yet sweet lemons from my parents-in-law’s lemon tree. They are simply THE best. So lemon donuts it was. They turned out so amazing that the next day I made them again. This time around I doubled the recipe and baked it as an 8-inch single layer cake for my parents-in-law’s wedding anniversary. So if you don’t own a donut pan, buy one ASAP! These little things are addicting! For now, simply bake them as mini cupcakes or just double this recipe to get a cake.


Baked Lemon Donuts with Lemon Cream Cheese Glaze3


The recipe is simplicity at its best. Almost refined sugar free. No eggs required. No mixer needed. Just one bowl and a whisk is all you need to make the sun shine brightest! You can even prepare the glaze in the same mixing bowl. I am always happy with less dishes and lesser clean up. So in these donuts, moisture is being imparted by buttermilk and oil. Honey shoulders the responsibility of lending sweetness. Truly ordinary ingredients create this extra-ordinary treat. These baked donuts are light, fluffy and just lemony which doesn’t make you pucker!

These donuts are then topped with lemon cream cheese glaze. The glaze is a perfect accompaniment for the donuts. Again, just lemony and just sweet. Decorate them with a sprinkle of yellow colored sanding sugar. Vibrant, just like our little one.

So celebrate life and all things nice with these lemon glazed donuts!


Baked Lemon Donuts with Lemon Cream Cheese Glaze4


Baked Lemon Doughnuts with Lemon Cream Cheese Glaze ~ Eggfree

Makes: 6 | Prep time: 15 minutes | Cook time: 10 minutes | Total: 25 minutes

Ingredients:

For donuts:
  • 3/4 cup + 2 Tbsp all-purpose flour
  • 1/4 tsp baking powder
  • 1/4 tsp baking soda
  • 1/4 tsp salt
  • 1 Tbsp white granulated sugar
  • 1 Tbsp lemon zest
  • 1/4 cup honey
  • 3 Tbsp oil
  • 1/3 cup buttermilk
  • 1/2 tsp vanilla extract
  • 2 Tbsp lemon juice (lemon enthusiasts may use 2.5 to 3 Tbsp)

For glaze:

Following measurements can glaze about 10-12 donuts.

  • 100 gm (3.5 oz) cream cheese, room temperature
  • 1 tsp lemon zest
  • 1 Tbsp lemon juice
  • 1/4 cup icing sugar, sifted
  • Yellow colored sanding sugar, to decorate

Directions:

  1.  Preheat the oven at 180ºC / 350ºF. Grease 6-count donut pan with oil. Set aside.
  2. In one bowl, whisk together flour, baking powder, baking soda and salt. Set aside.
  3. In a mixing bowl, add sugar and lemon zest and rub together with finger to release oils from the zest. Whisk in honey, oil, buttermilk, vanilla extract and lemon juice until the mixture formed is completely smooth.
  4. Slowly whisk in dry ingredients into wet ingredients until just combined. Do not overmix. Divide the batter among prepared donut pan and bake in the preheated oven for about 8-9 minutes or until a toothpick inserted in a center comes out clean. Cool in the pan on a cooling rack for 5 minutes. Then carefully turn out doughnuts directly onto rack to cool completely.
  5. Glaze: Whisk together cream cheese, lemon zest, lemon juice and sifted icing sugar to form a smooth consistency. Dip completely cooled donuts one by one into a bowl of glaze and place back on a cooling rack. Sprinkle with yellow sanding sugar just before serving as the colors will bleed. Donuts will keep in an airtight container for 2-3 days stored in a refrigerator.

*You will have little cream cheese glaze leftover which is never a bad thing in my book. You may lick with spoon or store it in refrigerator for 3-4 days. Give the glaze a good whisk before using on baked goods.
*Double the donut recipe and bake it in an 8-inch cake tin. Bake for about 20-23 minutes.
*To make this recipe vegan, make your own non-dairy buttermilk. To 1 tsp lemon juice or apple cider vinegar, add 1/3 cup non-dairy milk of your choice . Let sit for 15-20 minutes and use as a regular buttermilk substitution.

2-layer Pure Vanilla Cake ~ 1st Blogversary!!!

2-layer Pure Vanilla Cake1


Cook By Book in numbers:

– 500+ blog subscribers via email
– 140 on WordPress
– 160+ on Twitter
– 385+ on Instagram
-102 blogposts

My blog officially turns 1 today! Woohoooo!! Last year today I created and set up this blog and published my first blog-post the next day. For about 2 months before starting this space, I used to publish my recipes and pictures on my Facebook page but later I realized I wanted to share more than just a picture and a recipe with you all, in a more customized manner. That’s how this blog was born. It feels just like yesterday but time really flies when you blog. Blogging has taught me so much. Food photography and food styling is what I’ve become totally obsessed with! It is such a great way to connect with like-minded people all around the world and learn about their culture through food. I have made some awesome new friends!

I owe it all to you gorgeous readers! Thank you for making this past year so fulfilling, from having less than 5 to 500+ followers and many more on social media, I’m very grateful for all the support and love so far. Whether it is just a comment, an email or a follow, I want to thank you for all the amazing gestures that has made blogging so so incredible for me!


2-layer Pure Vanilla Cake2


I’m so so so happy, totally in celebratory mood! Throwing a party kinda mood. When I’m happy, I bake. So I baked a cake for this virtual party. It’s a party essential after all. Also, it is neither healthy nor low-fat. It’s buttery, sugary deliciousness. Pure vanilla goodness completely covered in pink whipped cream frosting. Yes! Today I’m sharing a classic vanilla cake which is sturdy in layer-cakes but moist and tender at the same time. A cake you can always depend upon. Make this your go-to recipe for anytime layer-cake requirements. Birthdays, Anniversaries or Weddings. An all-occasion versatile cake.


2-layer Pure Vanilla Cake3


I am no professional at frosting/decorating cakes but I’ve tried my best! Also, I did not have time to make frosting from scratch so I used packaged instant whipped cream, flavored it with 1/2 tsp vanilla extract and colored it with a drop of pink food color. It tasted pretty good too. I hope you enjoy this cake as much as I, husband, a friend, neighbors and my house-help enjoyed! Yes, I believe in sharing the goodness. Always! 🙂

2-layer Pure Vanilla Cake

Makes: 2 7-inch layers | Prep time: 20 minutes | Bake time: 30-35 minutes | Total time: 1 hour

Ingredients:

  • 2 cups all-purpose flour
  • 1 tsp baking powder
  • 1/4 tsp salt
  • A little less than 1/2 cup unsalted butter, at room temperature (about 100 gm)
  • 1 and 1/4 cups white granulated sugar*
  • Seeds scraped from 1/2 vanilla bean
  • 2 tsp vanilla extract
  • 2 large egg whites
  • 1 cup milk

*If you like your baked goods on a sweeter side, use 1 and 1/2 cups sugar instead.

Directions:

  1. Preheat the oven at 170ºC / 340ºF. Butter and flour two 7-inch (5-inch or 6-inch works too) baking pans and set aside.
  2. In a bowl, sift together flour, baking powder and salt. Set aside.
  3. In a bowl of your electric mixer, beat butter and sugar together until pale and creamy, about 3-4 minutes. Add vanilla bean seeds, vanilla extract and egg whites and mix until smooth.
  4. Add dry ingredients to the wet ingredients alternating with milk, beginning and ending with dry ingredients.
  5. Gently stir all ingredients until well combined. Stop mixer and scrape down sides and bottom of the bowl, making sure to have all ingredients mixed well.
  6. Divide batter among baking pans and bake for about 30-35 minutes or until a toothpick inserted in a center comes out clean. Remove and let cool slightly in baking pans for about 5 minutes, then invert on a wire rack and let cool completely.
  7. Frost cakes as desired. Use this Vanilla Bean Frosting recipe and instructions on how-to-frost-a-layered-cake. I colored the frosting with a drop of rose pink food color.

Note: If cakes are baked in 6-inch baking pans, you may cut them so that you have four layers altogether and if cakes are baked in 5-inch baking pans, you may cut them so that you have six layers altogether. This way you can make 4-layer or 6-layer cake using the same recipe.

Orange Muffins

Orange Muffins


Mondays should totally begin with muffins. We all need a muffin or two to get through the day and some more to celebrate getting through the day. I hope you all agree with me here.

When I posted Sunshine Smoothie last week, I promised I’ll return with some cake to celebrate the 100th blog-post. So drum-rolls please! I’ve returned today with equally sunshiny, happy-happy orange muffins!


Orange Muffins1

These muffins are perfect to woe away your Monday blues. Eat them any time of the day. With your morning-coffee, evening-tea or as a night-time dessert accompanied by a scoop of vanilla ice-cream. It’s a real treat and your summer-stricken soul will totally thank me. You’re welcome 🙂

Moist and fluffy, these muffins are a total winner. The orange flavor shines through because I’ve used orange zest, freshly squeezed juice and just a touch of orange extract. Look at their color! Addition of yogurt makes them soft and tender. Once out from the oven and still warm, we brush the tops with honey. Warm muffins ensure that honey seeps in. This is optional but totally heavenly. And genius. So do it!


Orange Muffins2


Orange Muffins

Makes: 12 muffins | Prep time: 10 minutes | Bake time: 15 minutes approximately | Total time: 25 minutes

Ingredients:

  • 1 and 1/2 cup all purpose flour
  • 1 tsp baking powder
  • 1/2 tsp baking soda
  • 1/4 tsp salt
  • Zest from 2 oranges
  • 1/2 cup granulated white sugar
  • 1/4 cup oil
  • 2 large eggs
  • 1/2 tsp vanilla extract
  • 1/2 tsp orange extract
  • 1/3 cup plain yogurt
  • 1/3 cup freshly squeezed orange juice
  • 3 Orange slices, seeded and cut into quarters
  • 2 Tbsp honey, to brush the muffin tops (optional)
Directions:
  1. Preheat the oven at 180ºC / 350ºF. Line 12-counts muffin pan with paper liners.
  2. In a mixing bowl, whisk together flour, baking powder, baking soda and salt. Set aside.
  3. In a medium mixing bowl, place the measured white granulated sugar. Grate orange zest in the bowl and using your fingers, rub it against the sugar. Whisk in oil and eggs one by one until completely incorporated. Whisk in vanilla and orange extract.
  4. Gently whisk dry ingredients into wet ingredients in three halves alternating with yogurt and orange juice, ending with dry ingredients. Mix until *just* combined. Do not over-mix the batter.
  5. Divide the batter evenly between 12 muffin liners. Fill each liner till 3/4th mark and no more. Top each muffin with a quarter of the orange slice. Bake for 13-15 minutes or until the toothpick inserted in the center comes out clean. While muffins are still warm from the oven, brush the tops with a layer of honey. The muffins stay fresh for about 3 days stored in an airtight container.

Baked Banana Donuts & Fresh Strawberry Cream Cheese Frosting ~ Healthier & Eggfree

Banana Donuts1
Wow… It’s been  3 weeks since my last blog-post! I’ve really missed you guys. If you follow me on Instagram then you know of my shenanigans. Past 3 weeks were spent vacationing leisurely in beautiful Goa and finishing some important paperwork back home. If you don’t follow me there then you’ve missed out on some amazing pics of sunsets and not-to-be-missed eateries in Goa so I’d suggest you tap that blue button right away! We had a fabulous time spending our 5th wedding anniversary, relaxing and lazying around on beach. It had been ages (more than a year!!) since we took our last vacation (just us) so this 10 days break was much appreciated. But my sun-burnt self is definitely glad to be back and you’re going to love this recipe I have for you!
After our holiday to the tropics, I recreated the scene in the comfort of our home and made these uh-mah-zing banana donuts. Oh and I didn’t serve them alone. Oh yeh! These are topped with fresh strawberry cream cheese frosting. Yes, it is 2 recipes in 1 blog-post kinda day today. Anyway I can compensate my absence on this space 😉
Banana Donuts2
These soft and fluffy whole wheat banana donuts are what dreams are made of! This is a healthier and eggfree version. Brown sugar has been used which used with bananas lends a caramelized depth of flavor. I prefer to use oil instead of butter in most of my cakes and cupcakes. Oil combined with yogurt gives moist and pillowy end product even when whole wheat flour is involved.
And what do I say about the frosting! It is super cool. Spread it on donuts or frost some vanilla or chocolate cupcakes with it. Yes, the recipe below will frost about 12 cupcakes and will frost 12 donuts even more generously with a spoonful or two extra for licking! The frosting naturally is pink without addition of any artificial color and it is flavored with real strawberries and just a bit of strawberry extract. Perfection indeed!
Happy Baking!
xx
Baked Banana Donuts with Fresh Strawberry Cream Cheese Frosting ~ Healthier & Eggfree
Makes : 12 donuts | Prep time: 20 minutes | Bake time: 13-14 minutes | Total time: under 30 minutes
Ingredients:

For donuts:
  • 1 cup whole wheat flour
  • 1 tsp baking powder
  • 1/4 tsp salt
  • 1/4 cup oil
  • 1/3 cup brown sugar
  • 1 + 1/2 cup mashed banana (about 3 large)
  • 6 Tbsp yogurt
  • 1 tsp vanilla extract
For frosting:
  • 2 large strawberries
  • 4 ounce / 110 gm plain cream cheese spread, at room temperature
  • 1 Tbsp butter, at room temperature
  • 1/4 tsp strawberry essence
  • 1/4 tsp strawberry essence
  • 1/4 cup icing sugar, sifted (or more as per preference)

Directions:

  1. Preheat the oven at 180ºC / 350ºF. Grease 12-count donut pan with oil. Set aside.
  2. Sift together flour, baking powder and salt in a bowl. Set aside.
  3. In a medium sized bowl, whisk together oil and sugar until completely incorporated. Whisk in banana, yogurt and vanilla extract.
  4. Gently fold dry ingredients into wet ingredients until no flour pockets remain. Do not over-mix. Divide the batter equally and fill the molds no more than 3/4th. Bake for 13-14 minutes or until toothpick inserted in the center comes out clean. Cool in the pan on a cooling rack for 5 minutes. Then carefully turn out doughnuts directly onto rack to cool.
  5. Preparing frosting: Wash, hull and pat dry 2 large strawberries. Cut them in small pieces and mash them using fork. Add cream cheese spread, butter and strawberry essence to the bowl and whisk using your electric mixer. Add sifted sugar to this mixture and whisk until completely incorporated and frosting is firm. On completely cooled donuts, spread a thick layer of this frosting. The donuts will keep well in refrigerator for 4-5 days.

Oreo Chocolate Brownies

Oreo Chocolate Brownies2

2 months into this year and 2014 has been spectacular so far! In the beginning of the year, Amrita (most popular as a bacon jam lady!) & I decided to do a little food exchange. She being a queen of all things yummilicious, I had a hard time deciding what to send. Just around that time, I had re-made these (Fudgiest!) Chocolate Brownies and sneaked in some Oreo cookies in them. They were epic! Oreo + Chocolate lover’s dream. I decided this was it but was still a bit skeptic.


or

Photo Courtesy – Amrita Kaur


Oreo Chocolate Brownies3

Imagine my relief when she said she totally loved it! She blogged about it too and thanks a ton to her, the recipe became so so popular. I got so many mails and messages from all you lovely people who tried and loved these beauties! I thank all of you beautiful readers who attempted the recipe and reported back. I lou you all. It definitely deserves a spot of its own on the blog so here it is!

Happy Baking! 🙂

Oreo Chocolate Brownies1

Oreo Chocolate Brownies

Makes: 9-12 squares | Prep time: 15 minutes | Bake time: Approximately 35 minutes
Ingredients:

  • 250 gm / 9 oz dark chocolate, roughly sliced
  • 1/2 cup unsalted butter, roughly sliced (approximately 115 gm)
  • 1/2 cup brown sugar
  • 1/2 cup white granulated sugar
  • 3 large eggs, cold
  • 1 tsp vanilla extract
  • 3 Tbsp Rum
  • 1 cup all-purpose flour
  • 1/2 tsp salt
  • 1 Tbsp Hershey’s unsweetened cocoa powder
  • 16 Oreo cookies, plus more for sprinkling
Directions:

  1. Preheat the oven to 180ºF / 350ºC. Grease an 8×8-inch square pan; line base and sides with parchment paper (I use foil).
  2. In a large microwave-safe bowl, melt chocolate, butter and brown sugar in a microwave for 1-2 minute, stirring every 30 seconds. The mixture should be lump-free and glossy. Set aside and let cool for about 10 minutes.
  3. Once chocolate mixture is cooled down, stir white sugar, eggs, vanilla extract and rum into it.
  4. In a separate bowl, sift together flour, salt and cocoa powder and fold into chocolate mixture with wooden spoon or rubber spatula. Pour half the batter in a baking pan and arrange whole 16 Oreo cookies on it in a single layer (do not press them down). Pour rest of the batter and sprinkle few pieces of Oreo on top. Bake for 33-36 minutes, until the toothpick inserted in the center comes out clean or with a few moist crumbs. Let cool completely in pan over a cooling rack. (If you’re in a hurry, throw it in a refrigerator or freezer for a while for easy cutting.)
  5. Lift up the ends of parchment or foil liner, transfer the brownies to cutting board and cut into 9 or 12 squares. Store it in an air-tight container for 3-4 days at room temperature or refrigerate for a week.

Baking 101 & Raspberry Banana Bread ~ A Guest Post on The Tummy Tale

Raspberry Banana Bread2


For many of you, baking can be quite overwhelming at first. A lot of beginners will burn a few (or a lot) of cookies, flatten some cakes or over bake brownies.  So when Elson asked me if I could do a post on baking basics, I was anxious (this kind of post is my first attempt!) and excited!!

I am reproducing that guest post ~ ‘Baking 101’ and the recipe of Raspberry Banana Bread for my readers here but hop onto The Tummy Tale blog for some good reading. While you’re at it, don’t forget to check out Elson’s fabulous recipes. Elson believes in using simple ingredients to create special dishes and his forte is Mangalorean cuisine. Also, do check out his ‘The world on my plate‘ series.

If you spend enough time in the kitchen baking, you quickly begin to pick up the dos and don’ts. I am far from a professional pastry chef or even an expert baker but with these tips and tricks, I’m hoping to make baking an easier, more enjoyable experience for you all. So, here it is – baker’s dozen tips & tricks!

  1. Take your time and read the recipe thoroughly from beginning to end before you start. Many baking failures come from not reading and understanding the recipe, not from poor recipes! Remember, cookbook authors and bloggers REALLY want to help you bake masterpieces. They know and understand the limitations of home kitchens. So have faith in the recipe and read the notes.
  2. Get your mise en place started. Measure out all the ingredients mentioned in the recipe to exact amounts first before you proceed further. There is nothing worse than reaching halfway and realizing you’re out of an important ingredient. Prepping is very very important.
  3. Unless otherwise stated, use room temperature ingredients. If something is meant to be used cold then a recipe should state that, otherwise make sure your eggs, butter, yogurt etc. are at room temperature.
  4. Buy salted butter for your toast but unsalted butter is what you need for all the baking you plan on doing. You want to control the amount of salt going in your baked goods. So unsalted is a way to go!
  5. Always preheat the oven. This might sound amusing to some of you but this step is of utmost importance.
  6. Preparing baking pan – Grease and/or line your baking tin. Use paper liners for muffin tins (unless stated otherwise). Always grease a Bundt pan with butter and dust the insides with flour. Do not grease the cookie sheet unless the recipe states you should; just line it with parchment paper.
  7. It is always better to sift the dry ingredients to avoid lumps. This step will ensure that baking powder, baking soda or salt are equally dispersed among flour. Also, measure the flour after it’s been fluffed up a bit with the help of a fork. Lightly spoon it into the measuring cup and level it off (weighing flour is of course more accurate but I’m more accustomed to cup-method).
  8. Use baking powder and baking soda no more than 5-6 months old. Dud ingredients will make your recipe dud. Also, baking powder and baking soda are different ingredients and not interchangeable! So pay attention. They serve the same purpose but do not react the same way in baked goods. Read here for more info.
  9. When baking cakes, cupcakes and cookies, take your time creaming the butter. Beat/cream for at least 3-5 minutes (preferably with the electric mixer’s paddle attachment) to aerate the butter.
    Check if the recipe calls for any herb or fruit zest. If so then rub the herb/fruit zest into the sugar which will release the essential oils and then add this sugar to butter and beat/cream really well again. A trick I have learnt recently from Joy The Baker is beating the spices along with the butter and sugar to enhance the flavor much more.
  10. When mixing the batter, gently fold the liquid ingredients into the dry ingredients – you don’t want to lose all the air. Over-mixing will especially ruin your muffins and make them tough and rubbery.
  11. Keep in mind that all ovens are different. Do not rely on the time in the recipe to work for your oven. It is usually provided by a time range which is just an estimate for you. Set your timer for several minutes before it says it will be done just to make sure you don’t overcook. Check the doneness by inserting toothpick in the center of the baked goods. Trust the process and trust yourself.
  12. Make it your own! Just because baking is all about science doesn’t mean you can’t get creative with the ingredients that only affect the flavor. Change up the extracts, spices, and other add-ins that only affect the flavor of the baked goods to make it your own. Have fun in the kitchen and it will all turn out amazing!


The more you bake, the better you will become. But remember… “When baking, follow directions. When cooking, go by your own taste.” – Laiko Bahrs J 🙂


Raspberry Banana Bread3


*Recipe*

This recipe is a no fuss, too easy even for beginners sort. So after reading the tips and tricks mentioned above, get your baking mojo on and try this basic, classic banana bread made a tad bit healthier. Vegetarians and vegans are going to be much much happy.

This recipe is eggfree and oil/butterfree. Yes! Can you believe?!! For sweetness, I have used date syrup in part which lends a beautiful depth of flavor to the bread. The other part comprises of brown sugar. Brown sugar + banana = a match made in heaven! Brown sugar gives a caramelized flavor but you can make the bread refined sugar-free too by using coconut sugar in place of the brown sugar. It would be wonderful too! The bread is light, airy and moist (in a good way). Yes! Not a crumb in sight, my friends. Perfect for toasting and if you’re not skinny-minny types then slathering it with some butter. If you are not into healthy baking then feel free to use all-purpose flour completely. Don’t have date syrup? Use liquid jaggery or maple syrup or honey. All works brilliantly. Don’t have raspberries? Use strawberries or may be toasted walnuts or chocolate chips! Change the ingredients as per your convenience and make the recipe yours. Add a dash of cinnamon if you like. Just have fun! So brew yourself a cup of coffee, preheat the oven and get baking. Your quest for that perfect banana bread ends here.

Enjoy!

Healthier Raspberry Banana Bread – Eggfree & Oil/Butterfree {can be made refined sugar-free too!}

Yields: 1 8×4-inch loaf, about 10 slices | Prep time: 10 minutes | Bake time: 60 minutes | Total time: 70 minutes

Ingredients:

• 1 cup whole wheat flour
• 1/2 cup all purpose flour
• 1 tsp baking soda
• 1 tsp salt
• 1/3 cup yogurt
• 1/3 cup date syrup (or liquid jaggery or maple syrup or honey)
• 1/3 cup brown sugar (to make it refined sugar-free use coconut sugar)
• 3 large over-ripe bananas, mashed (I used heaping 1 & 1/2 cups purée)
• 1 tsp vanilla extract
• 1 cup chopped raspberries (fresh or frozen)

Directions:

1. Preheat the oven at 170°C/350°F. Grease the 8×4-inch loaf pan with oil and set aside.
2. In a large mixing bowl, whisk together whole wheat flour, all-purpose flour, baking soda and salt. Set aside.
3. In a separate bowl, whisk together yogurt, date syrup and brown sugar until completely incorporated. Whisk in banana purée and vanilla extract.
4. Make a well in the center of dry ingredients and slowly stir in wet ingredients to dry ingredients. Stir until no flour pockets remain. Do not over-mix. Fold in chopped raspberries.
5. Pour the batter in your prepared loaf pan and bake for 60 minutes or until a toothpick inserted in the center comes out clean or with few moist crumbs. Let the bread rest in the loaf pan for about 10 minutes before inverting it on a cooling rack. Let cool completely before slicing. Serve warm as is or slathered with butter. You may toast the slices too. Store the bread in an airtight container up to 1 week in refrigerator. It freezes well for up to 3 months.

*For a more classic twist, substitute raspberries with toasted walnuts. For chocolate lovers, I would suggest replacing raspberries with dark chocolate chips. I’ve tried and it is dee-vine!

Tomorrow is ‘Banana Bread Day’ and you might wanna bake one to celebrate!