Guest Post on The Vanilla Bean: Pineapple~Coconut Breakfast Loaf

Pineapple-Coconut Breakfast Loaf1


When Roshni from The Vanilla Bean asked me to do a guest-post on her blog, I wanted to bake something simple and quick for her readers. Yet something which look and taste like you’ve spent the whole morning working on it but in fact was just left in the oven to work its own magic.

Roshni has a special soft corner for cakes hence I decided to rustle up this breakfast loaf which is moist and crunchy at the same time. Each bite is filled with pineapple and coconut bits. It’s a tropical heaven! Perfect for the rushed up mornings. Just plonk it in the oven right before you had for the bath and it would be ready when you’re back!

The loaf is actually quite healthy with whole wheat flour, olive oil and brown sugar. Feel free to substitute the sugar in the recipe with date syrup, honey or liquid jaggery.

Drop by here to get my recipe of pineapple-coconut breakfast loaf and don’t forget to check out The Vanilla Bean blog for some delicious recipes. Thank you again, Roshni, for having me over!

Apple Cinnamon Stovetop Oatmeal For One

Apple Cinnamon Stovetop Oatmeal For one1

You don’t need me tell you how to make an oatmeal. I’m sure, you can handle that on your own.

Maybe I need to remind myself how to make oatmeal. Maybe I need to remind myself to make oatmeal at all… and eat it.. for breakfast. Staring at my laptop first thing in the morning, burning my mouth sipping hot coffee does not make breakfast.

I thought if I needed a reminder, you might need it too. So let’s make this healthy stovetop oatmeal with apple and cinnamon. A treat for that special person, YOU!

Apple Cinnamon Stovetop Oatmeal For one2

This oatmeal is perfect for the weather… so comforting and so healthy! Have an exciting weekend!

Apple Cinnamon Stovetop Oatmeal

Serves: 1 | Ready under 10 minutes

Ingredients:

  • 1 tsp unsalted butter
  • 1 medium apple, cored and diced
  • 1 + 1/2 Tbsp brown sugar (more or less as per your liking)
  • pinch of salt
  • 1/2 tsp ground cinnamon
  • 1/2 cup quick cooking oats
  • 3/4 cup water
  • 1/2 cup milk
  • 3 Tbsp chopped walnuts
  • 3 Tbsp dried cranberries

Directions:

  1. In a medium saucepan, melt the butter over medium-high heat. I let the butter get browned a bit and add diced apple. Sprinkle salt, brown sugar, cinnamon and cook for 1-2 minutes till apples soften.
  2. Pour in water, turn the heat up to high and bring to a boil. Add the oats and reduce the heat a little. Cook stirring occasionally for a minute or till most of the liquid is absorbed.
  3. Turn the heat off. Top with milk, walnuts and cranberries. Stir to combine. Serve immediately, sprinkled with cinnamon/brown sugar.

M&M Oreo Cookie Bars

M&M Oreo Cookie Bars1

Hello Oreo lovers! Hello M&M lovers! Let’s get united 🙂

These bars are heavenly for texture-lovers! Every bite is filled with crunchy chopped Oreos and M&M’s contrasted with soft, buttery, moist dough. They are dense, thick and biteful. I have used dark brown sugar in the recipe which gives a beautiful caramel-ish flavor mixed with chocolate Oreos.

These bars come together in 1-bowl, just under 5-minutes, and without using mixer! These are ready under half an hour. Perfect to satisfy those sudden sugar-cravings! It is so quick, easy and of course, no dough chilling required.

M&M Oreo Cookie Bars2

Another advantage is, this recipe is very accommodating. You can use anything you like as fillers. So bookmark this one as your base recipe for bars and blondies. Feel free to sub Oreos with any other left-over cookies, peanut butter cups, pretzels, chocolate chips. Do not shy away from experimenting. Instead of M&M’s, arrange the top with lots of mini marshmallows. It will be heavenly! I’m going to do marshmallow version soon! Till then enjoy this 🙂

M&M Oreo Cookie Bars3

M&M Oreo Cookie Bars
Yields: 9 to 12 squares | Prep Time: 5-10 minutes | Cook Time: 20-22 minutes | Total: 30 minutes
Ingredients:

  • 1/3 cup + 1 Tbsp unsalted butter, melted
  • 1 large egg
  • 1/2 cup dark brown sugar, lightly packed
  • 1 Tbsp vanilla extract
  • 1 cup all purpose flour
  • 1/4 cup Graham cracker crumbs
  • Pinch of salt
  • 15 Oreo cookies, roughly chopped (I used chocolate Oreos)
  • 1/2 cup M&M’s (Nestlé Smarties, Cadbury Gems or any other chopped candies can be used)

Directions:

  1. Preheat oven to 180ºC/350ºF. Line an 8×8-inch baking pan with aluminium foil, grease with oil or spray with cooking spray. Set aside.
  2. In a large, microwave safe bowl, add butter and place in microwave for 1-minute on high power.
  3. Wait a minute before adding the egg so that it does not scramble. Add the egg, sugar, vanilla and whisk until smooth.
  4. Add the flour, Graham cracker crumbs and salt. Stir until just combined. Do not over-mix.
  5. Stir in the Oreo chunks.
  6. Turn the thick batter out into prepared baking pan, smoothing the top lightly with a spatula or back of the spoon.
  7. Evenly sprinkle the M&M’s over the top, lightly pressing them down with your finger, a spatula or back of the spoon.
  8. Bake for about 20 to 22 minutes, or until toothpick inserted in the center comes out clean, or with a few moist crumbs. Allow to cool in pan for at least 30 minutes before slicing and serving. Bars will keep for up to 1 week at room temperature stored in an airtight container, or in the freezer for up to 6 months.

Baked Orzo with Spinach, Corn & Asparagus

Baked Orzo with Spinach, Corn & Asparagus1
Okay, I have a pattern. On this blog. I write either about desserts or pasta here. I have a proof. But what can I say?! They are two of my favorite things. The weather here is not helping the matters either. This rainy, gloomy weather forces me to switch on the oven almost everyday! It makes me add cinnamon to every sweet stuff I bake so that the house smells like Fall. I am craving soups and wearing cardigan while going out. Gosh, how I am in love with the weather right now!!
You guys know I am all for skinny dishes. But that does not mean I do not like eating overloaded cheesy goodness. In fact, I LOVE it so much but just NEVER make it. I can’t bring myself to add a pound of cheese to any dish knowingly. Period.
Baked Orzo with Spinach, Corn & Asparagus2
This dish here is in no way skinny. But not unusually loaded either. Something in between. A dish I would dive in. It is everything I had hoped and dreamed for in baked pasta. There’re pillows of corn and asparagus throughout. There are decadent, gooey cheese pulls stretching from every forkful. And it is easy. Yes, as easy as this simple mac-n-cheese I know how to make. So make it NOW as there is no reason to keep yourself away from such a bliss.
Baked Orzo with Spinach, Corn & Asparagus
Serves: 2
Ingredients:

  • 1/2 cup Orzo, a rice shaped pasta
  • 1/2 cup corn kernels
  • 8-10 spears of asparagus cut into 1-inch pieces, hard/woody ends discarded
  • 1 Tbsp olive oil
  • 5-6 shallots, finely chopped
  • 2 garlic cloves, minced
  • 1 stalk of celery, finely chopped
  • 2 Tbsp tomato pest
  • 1/2 cup spinach leaves, packed, roughly chopped
  • 3 Tbsp Parmesan cheese, shredded
  • 1/3 cup Mozzarella cheese, small cubes of 1/2 cm
  • salt, to taste
  • freshly ground pepper
  • 1/4 tsp oregano flakes
  • 1/4 tsp red chili flakes
  • 1/2 tsp lemon zest
  • 1/2 cup reserved pasta water

Directions:

  1. Preheat the oven to 180ºC / 350ºF. Boil a pot of water with generous sprinkle of salt. Add Orzo, corn kernels and asparagus to the boiling water. Let it boil for 2 minutes and after that save 1/2 cup of water. Drain Orzo, corn kernels, asparagus and set aside.
  2. Simultaneously heat a large frying pan over medium-high heat. Add oil to the hot pan and once oil is shimmering, add the shallots, garlic and celery. Cook for 3 minutes or so till shallots turn translucent. Add tomato paste, Orzo, corn kernels, asparagus and cook for 3 more minutes. Off the heat. Immediately mix-in spinach leaves.
  3. Add Parmesan, Mozzarella, salt, pepper, oregano, red chilli flakes, lemon zest and pasta water and mix well.
  4. Transfer mixture to a small oval or 6×6-inch square ovenproof baking dish. Cover with foil and bake for 15 minutes, then bake for 15 minutes without the foil. (You can change ratio of foil-on to foil-off time as per your preference for crunchy pasta lid.) Let rest for 5 minutes before serving.

Notes:

*You can use whole-wheat Orzo or replace Orzo with any other small-sized pasta.
*I used pasta water and did not feel that the dish was lacking in flavor at all. But if you do not like using water then use vegetable stock.

Sweet~Lime Layer Cake with Cream Cheese Filling & Vanilla Bean Frosting

Sweet-Lime Layer Cake with Vanilla Bean Frosting1
I mentioned in my previous posts that I’m surrounded by family from past few weeks. Last Friday, the 13th was husband’s birthday. His folks were in town for the celebration. Yaay! So as you must have already guessed, I was going to bake the birthday cake myself. I asked him what flavour he would like this year and without thinking much he said I want lemon… And I was like, lemon cake?! Really?!!
I was thinking more like my favorite chocolate cake layered in a fancy tier-cake, filled with chocolate ganache and slathered with mocha frosting and he says he wants lemon this year?! Hmm… Even though I was a lil disappointed, I obliged to his wishes! I knoooww *best wife of the year* isn’t it! I had to add my own twist to the cake of course and hence this awesomeness happened. Less tart but tangy, zesty and supremely moist.. win-win for all! Of course, I didn’t tell him that it is sweet-lime until he ate a giant piece at midnight! He was indeed surprised and super-happy which made my whole-day’s effort totally worth it! 😀
Sweet-Lime Layer Cake with Vanilla Bean Frosting2
I had made sort of a similar cake with lemons few months ago for my dear friend’s baby girl. It marked her 1st month on the earth. That cake was egg-less, used buttermilk and everyone loved it! So I just had to tweak my old recipe a bit and came up with this soft, springy and moist cake. Layered with cream cheese filling which is out-of-the-world but the hero here guys is, vanilla bean frosting… It is AWESOME! Trust me 🙂
Sweet-Lime Layer Cake with Vanilla Bean Frosting5
Sweet-Lime Layer Cake with Vanilla Bean Frosting4
I made every single element on this cake on same day. If you do not have such a luxury of time then I suggest you make cakes a day before and refrigerate them individually covered in clingfilm until you’re ready for assembly. Make filling and frosting just before assembling the layers. This will certainly cut down on waiting time as the cakes would be cool and ready for the assembly the next day. So let’s get on with the recipe!
*Please pardon the pictures as the only chance I got was couple minutes before the celebration!
Sweet~Lime Layer Cake with Cream Cheese Filling & Vanilla Bean Frosting
Makes: 1 6-inch 3-layered cake
Ingredients:
For the cake:
  • 2 and 1/2 cup all-purpose flour
  • 1/2 Tbsp baking powder
  • 1/2 tsp baking soda
  • 1/4 tsp salt
  • 14 1-inch cubes of unsalted butter
  • Zest of 3 sweet-limes
  • 1/2 cup sugar
  • 4 large eggs
  • 1 cup yogurt
  • 1/2 tsp vanilla extract
  • 1/2 cup sweet-lime juice, freshly squeezed (Around 3 sweet-limes needed)

For the filling:

  • 100 gm/4 oz. cream cheese, cold
  • Zest of 1 sweet-lime
  • 1/2 Tbsp lemon juice
  • 3/4 cup icing sugar, sifted
  • 1/2 cup medium-fat cream
For the frosting:
  • 1 cup unsalted butter
  • 1 cup icing sugar, sifted
  • Pinch of salt
  • 1 vanilla bean, split lengthwise
  • 1/2 tsp vanilla extract
  • 3 Tbsp medium-fat cream, whipped
For the garnish:
  • Yellow and green colored sparkling sugar
  • 1 sweet-lime slices

Directions:

To make Cake:

  • Preheat the oven to 180°C / 350° F. Butter and flour the edges of 3 6-inch round cake pans and shake out the excess. Set aside. Line the bottoms of the pans with parchment paper.
  • In a medium mixing bowl, whisk together flour, baking powder, baking soda and salt. Set aside.
  • Add the butter to the large bowl and prepare electric hand-mixer or electric stand-mixer fitted with the paddle attachment.  Add the lime zest to the bowl with the butter.  Beat on medium-high speed for 3 minutes, until light and creamy in color.  Scrape down the sides of the bowl and beat for another minute.
  • Add the sugar to the butter mixture, ¼ cup at a time, beating 1 minute after each addition.  Add eggs, one at a time until incorporated.  Scrape down the sides of the bowl after each addition.
  • Combine yogurt, sweet-lime juice and vanilla extract in a liquid measuring cup.  With the mixer on low speed, add the dry ingredients alternately with the wet ingredients, beginning and ending with the dry ingredients and mixing just until incorporated.  Scrape down the sides of the bowl and mix for 15 seconds longer.
  • Divide the batter between the prepared baking pans.  Bake until golden and a toothpick inserted in the center comes out clean, about 20-22 minutes, rotating the pans halfway through baking. Let cool in the pans about 10 minutes, then invert onto a wire rack and let cool completely.

To make Cream Cheese Filling:

  • Combine the cream cheese and butter in a bowl of an electric mixer. Beat on medium-high speed until smooth and well combined.
  • Mix in icing sugar and beat on low speed until incorporated.
  • Blend in lemon juice and sweet-lime zest. Increase the speed to medium-high and beat until light and fluffy, about 2 minutes. Transfer the mixture to a medium bowl and set aside.
  • Wipe out the mixer bowl and fit with the whisk attachment. Add cream to the bowl and whip on high speed until stiff peaks form, being careful not to overbeat. Mix about a third of the whipped cream into the cream cheese mixture to lighten. Gently fold in the remaining whipped cream until no streaks remain and the mixture is evenly blended.

To make Vanilla Bean Frosting:

  • Add butter to the bowl of an electric mixer fitted with the whisk attachment. Whip on medium-high speed until smooth, about 1 minute.
  • Add icing sugar to the bowl and mix on medium-low speed just until incorporated.
  • Scrape the seeds from the vanilla bean pod into the bowl and add in the salt.  Continue to beat on medium-high speed until smooth, about 1-2 minutes.
  • Mix in the vanilla extract and whipped cream on low speed just until incorporated. Increase the mixer speed and whip on high speed until light and fluffy, scraping down the bowl as needed, about 4 minutes.
Assembly:
  • Level cake layers if necessary. To assemble the cake, place one of the layers on a serving platter. Top with half of the cream cheese filling and smooth in an even layer.  Place a second cake layer on top of the filling and top with the remaining filling. Place the final cake layer on top.
  • Frost the top and sides of the assembled cake with the vanilla bean frosting.
  • Sprinkle some yellow and green colored sparkling sugar around the 1-inch border of the cake. Garnish the centre with the sweet-lime slices.

Notes: 

  • To make the frosting look whiter, use white unsalted butter and clear vanilla extract.
  • If you wish to decorate the top of the cake with piped frosting instead of fruit, double the frosting recipe. Use a pastry bag with a decorative tip to pipe accents on the cake. You may have some extra frosting which is always a good thing in my book! 😉

Frozen Sweet Lime~Pomegranate Cheesecake

Frozen Sweet Lime~Pomegranate Cheesecake1

You know how much I love cheesecake… It is my go-to comfort food more often than I would like to admit. Happy days and stressed days equally call out for cheesecake around here! I’m very finicky about my cheesecakes. Till now my most favorite has been a blueberry cheesecake from a particular cafe. It is heavenly and just how I like my cheesecake to be. And I would never dare to make one in my house as long as that cafe exists!
After trying and making so many different varieties of cheesecakes, I decided to whip up this no-bake, gelatin-free, creamy, cheesy, frozen dessert. Let me simplify this for you. This dessert is nothing but a cheesecake ice-cream which is layered over a salty, buttery, chocolaty crust.
My refrigerator was bursting with sweet and juicy pomegranates. It was a flavor I had never tried before in a cheesecake. I thought it would make a delicate and lovely pairing with cream cheese. To make things tangy, I used up zest and juice from a sweet lime. The result was such a gorgeous baby pink color cheesecake! I just fell in love with it 🙂
Frozen Sweet Lime~Pomegranate Cheesecake3
I went sweet and salty route this time. The crust for this cheesecake is made with chocolate Oreos, butter and just a pinch of salt. This salty kick enhances the cheesecake flavor to another level. If you’re not a fan of sweet-n-salt, feel free to skip the salt as it will still taste divine! But I highly recommend salt as it is not too over-powering. So promise me you’ll add it to know what I’m REALLY talking about… You’ll thank me! 😉
Frozen Sweet Lime~Pomegranate Cheesecake2
Frozen Sweet Lime~Pomegranate Cheesecake4
I made a big batch as I was having company but you can easily halve the recipe and make it in 4-inch spring-form pan. The frozen cheesecake tastes best when eaten within 12-15 hours of being made. It becomes harder and icier the more it stays in the freezer. In case of leftovers, let it thaw for 15 minutes before serving.
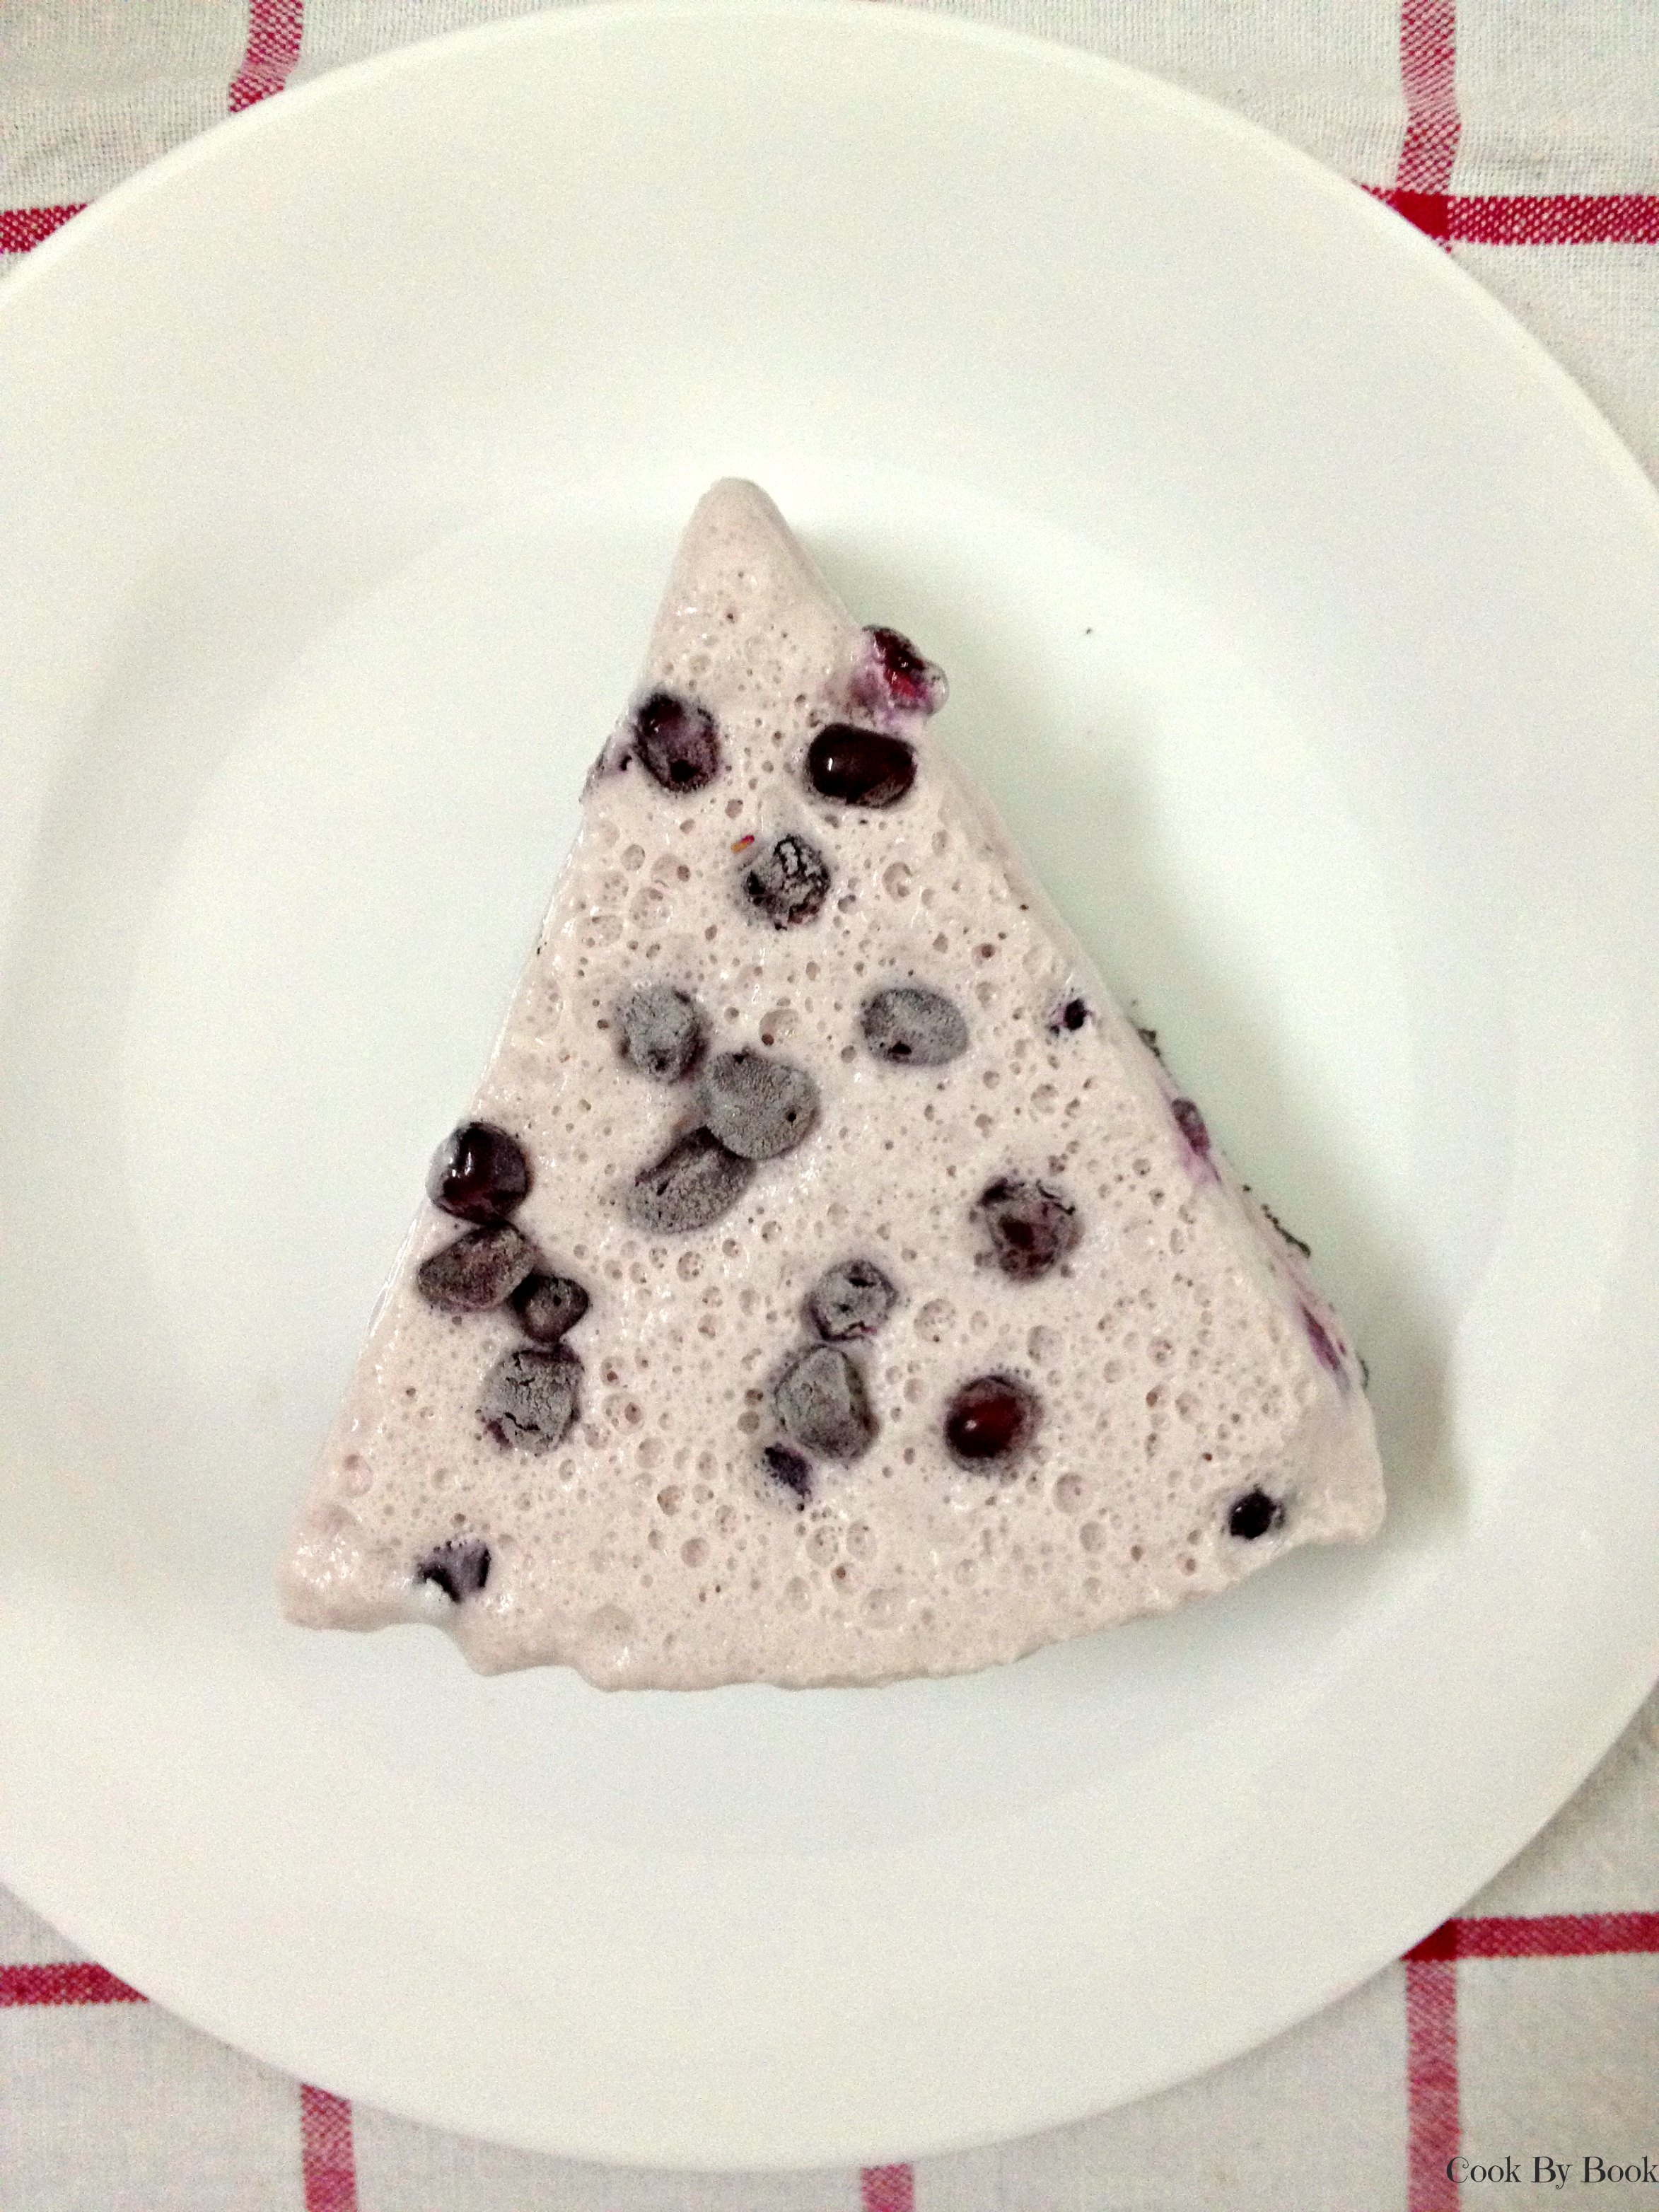
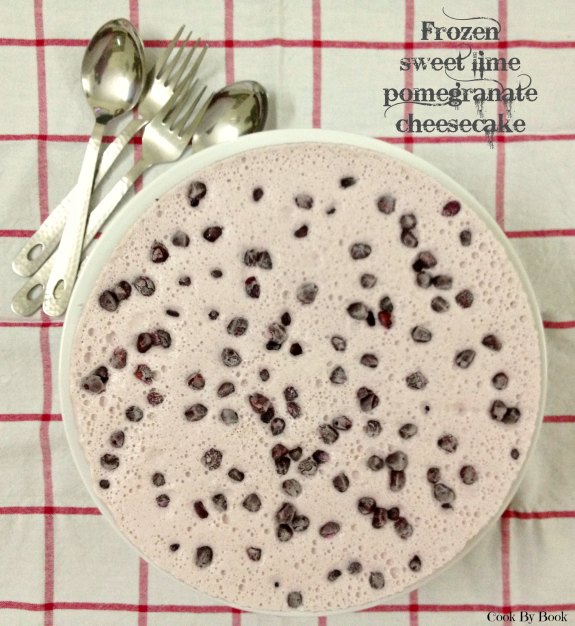
Frozen Sweet Lime~Pomegranate Cheesecake with Salted Oreo Crust
Makes: 10-12 slices | Prep time: 20 minutes | Cook time: 0 minute | Chilling time: 4-5 hours
Ingredients:
Crust:

  • 15 chocolate Oreos or any chocolate sandwiched biscuits
  • 3 Tbsp melted butter
  • 1/4 tsp salt
Cheesecake Filling:
  • 3 pomegranates
  • Zest and juice from 1 sweet lime
  • 1/2 cup + 1 Tbsp icing sugar
  • 2 8 oz. package cream cheese, at room temperature
  • 2 cups medium-fat fresh cream (40% fat), chilled

Direction:

  1. Line 9-inch round spring-form pan with parchment paper. Grind Oreos in a food processor until you have fine crumbs. Add melted butter and salt. Spoon the crust and press down firmly over the base using flat base of a glass. Chill in refrigerator while you make the filling.
  2. Remove morsels from pomegranates, save morsels from half pomegranate and juice rest of the morsels with lime juice. Strain the juice into a bowl, add icing sugar and whisk to dissolve.
  3. In a large bowl, take cream cheese and whisk until smooth. Use electric hand mixer/stand mixer for this. Add juice and sweet lime zest to cream cheese and whip till combined.
  4. In a separate bowl, whip the fresh cream till soft peaks form. Gently fold it with cream cheese mixture to achieve a lump-free consistency.
  5. Remove spring-form pan from the refrigerator and spoon the cheesecake filling over the crust. Let it chill in freezer covered in cling film. After 1 hour, sprinkle with pomegranate seeds and return to chill in freezer for another 3-4 hours. Once set, release from spring-form pan, slice and serve. Run the knife under hot water before slicing.

Note: Can be consumed as a sweet lime~pomegranate cheesecake ice-cream if frozen without the Oreo crust.

Skinny Banana Chocolate-chip Dutch Baby

Skinny Banana Chocolate-Chips Dutch Baby4

I know I went MIA AGAIN and you must think that I do not take the blog seriously but in my defense, life happened. It so happens that life loves to throw unlikely surprises my way! So what happened you ask… Well, my in-laws arrived in town 3 weeks back and due to the super-dramatic climate-change here, both caught Mono. Next in queue was my hubby dearest!

So in the midst of house-work and multiple visits to the clinic on daily-basis, I could squeeze in time to blog only 2 previous recipes. I was definitely active on social media. I did check-out what my other blogger friends were writing about but I did not have patience to write down a recipe or to edit pictures for the post. It’s not like I did not have recipes to post or I was not cooking. In fact, I was cooking more regularly than ever! At least 3 different meals were being prepared on a daily basis. And now that everyone is fit and fine, I’m going to take a little breather from home-cooking and going to eat-out little bit more and of course, start posting here regularly!

Skinny Banana Chocolate-Chips Dutch Baby1

I bring you today another easy skinny pancake recipe. It is perfect for breakfast or Brinner, serves a small family perfectly that too without the hassle of flipping individual pancakes! You know I’m lazy and love quick-fixes more than anything right?! 😉

The Dutch Baby is another name for German pancake which is baked in a cast-iron skillet or a metal pan and its puff falls soon after being removed from the oven. This pancake is ready in a record time of 20-25 minutes from start-to-finish! Made with minimum ingredients, this is a perfect recipe for days when your refrigerator has scarce ingredients. You just need 2 eggs, little flour, some milk and 1 banana to be in business! Rest of the ingredients are your usual suspects.

I do not own a cast-iron skillet so I baked this in a 10-inch metal pan I have. Brown sugar, banana and cinnamon is a match made in heaven. The result is perfectly caramelized banana topped pancake topped with chocolate-chips. Your house is going to smell delicious for next few hours! Whattay way to start mornings or end work-laden days! Enjoy! 🙂

Skinny Banana Chocolate-Chips Dutch Baby2


Skinny Banana Chocolate-Chips Dutch Baby3

Skinny Banana Chocolate-chip Dutch Baby

Makes: 1 big Dutch Baby | Prep time: 5 minutes | Cook time: 15 to 20 minutes

Ingredients:

  • 1 banana thinly sliced
  • 1 Tbsp unsalted butter
  • 2 large eggs
  • 1/2 cup milk (skim milk, soy milk or almond milk)
  • 2 or 3 Tbsp brown sugar
  • 2 tsp vanilla extract
  • 1/2 cup whole wheat flour
  • 3/4 tsp ground cinnamon
  • Pinch of salt
  • 2-3 Tbsp dark chocolate chips (Use more as per your liking)
Directions:
  1. Preheat the oven to 425 F.
  2. Prepare a 9-inch oven-safe skillet by spraying with cooking spray or greasing it. Place butter in the skillet. Put skillet in the oven to melt the butter. You can do this while oven is still in preheating mode. Once butter has melted, in about 2-3 minutes, remove the skillet from the oven and set aside.
  3. In a large bowl, add eggs, milk, sugar, vanilla and whisk to combine.
  4. Add the flour, cinnamon, salt and whisk until smooth and free from lumps.
  5. Pour the batter on to the skillet and evenly top with banana slices. Sprinkle the chocolate chips evenly and bake for 15-20 minutes until golden and puffy. Mine was ready in 15 minutes.
  6. Slice and serve optionally with a dusting of powdered sugar or a pour from maple syrup.