Skinny Summer Popsicles

Skinny Summer Popsicles1
I love popsicles any time of the day. Be it for breakfast, an afternoon snack or dessert. I mean who doesn’t, right?! This one here is so refreshing and healthy without addition of any sugar, be it refined or unrefined. Just some fresh fruit pieces blended along with little bit of fruit juice. It’s a perfect pick-me-up treat using all the gorgeous summer bounty on offer. I bet you can’t stop at just one!
Hope you all are having a great Monday!
xx
Skinny Summer Popsicles
Yields: 4 popsicles | Prep time: 5 minutes | Cook time: 0 | Freeze time: 4-5 hours/overnight
Ingredients:
Puree 1:
  • 6 slices fresh pineapple
  • 1/3 cup pineapple juice (freshly squeezed or packed)
  • Pinch of salt
  • Zest from 1/2 orange
Puree 2:
  • 1/4 cup cherries, pitted
  • 1 medium nectarine, cored
  • 1/2 cup freshly squeezed orange juice (from about 1 orange)
  • Pinch of salt

Directions:

  1. Puree 1: In a blender, blend together pineapple slices, pineapple juice and salt. Stir in orange zest to it and divide the puree among 4 popsicle moulds.
  2. Puree 2: Wash and wipe the blender dry. Add all the ingredients mentioned under puree 2 in a blender and process until smooth. Top the popsicle moulds with puree 2, dividing equally.
  3. Insert stick in the centre of each mould, cover and freeze for about 6-7 hours. To demould, run the moulds under warm running water for 30-50 seconds. Enjoy!

*Recipe can be easily doubled or tripled or quadrupled!


Skinny Summer Popsicles2


Mango Cucumber Salsa

Mango Cucumber Salsa1
Hi! Trying to compensate my absence with back to back posts. I need to blog all the summer recipes I’ve made before the rainy season officially starts and I am really lagging behind. I thought at least I’ll give you this mango salsa recipe before mango season is ends. This salsa is a perfect accompaniment to your chips and a great side to grilled chicken or lamb chops.
I don’t remember how many bowls of this sunshine I have devoured this summer. It is my absolute favorite. I eat chips just so that I can have salsa (or any other dips/condiment for that matter!!) and end up having it by spoonfuls in lieu of chips! I have a couple of peaches sitting in my fridge, waiting to be used up & I most certainly plan of turning them in to this salsa sans cucumber this evening (with mint of course!).
Enjoy& be patient.
Weekend is almost here! 😉
Mango Cucumber Salsa2
Mango Cucumber Salsa:
Serves: 2 | Prep time: 5 minutes | Cook time: 0 minute | Total time: 5 minutes
Ingredients:

  • 1 small red onion, finely chopped
  • 1 jalapeño pepper, seeded & finely chopped
  • 1 cucumber, finely chopped (about 1 cup)
  • 1 ripe mango, sliced, pitted & finely chopped (about 1 1/4 cup)
  • Salt & freshly cracked pepper, to taste
  • 1/4 cup fresh basil, chiffonade (can be subbed with coriander leaves)
  • Juice from 1 lemon

Don’t know what is basil chiffonade? – Pioneer woman tells you here!

Directions:

Toss all of the ingredients in a bowl. Refrigerate until ready to serve (about 3-4 hours max otherwise it turns mushy). Serve with your favorite chips or a meat of choice.

3-Ingredient Watermelon Kiwi Popsicles

3-Ingredient Watermelon Kiwi Popsicles3


Hello lovely people! Let me give you an update on whats been going on in life, you don’t know if you’re not following me on Instagram. It’s been more than 2 weeks since I last posted. Very eventful 2 weeks they were. Hubs & I visited my parent’s house for about 10 days. We celebrated Father’s day, spent some time with my grandmother, met up with couple of school friends after long long time, visited some cool, hip places for meal, watched drama after ages, shopped with my mom & sis, visited beach, bought way too many peach fruits, brushed up on some childhood memories, had an early birthday celebration and consumed liters and liters of Aamras (unsweetened mango pulp) accompanied by some kickass mom-made Gujju food! List is quite long and don’t ask me how I was able to fit ALL of this in my stomach in our such a short stay!!! But it was all too much fun!

I celebrate my 29th birthday this Saturday. I’m freaking out as big 3-0 is approaching and my life in twenties as I know it is going to end. I am excited too ‘coz CAKE!!! Yeah, my brain is confused on how to react to this situation. Anyhoo, Friday can not get here sooooner! It is going to be a funtastic weekend!! 🙂


3-Ingredient Watermelon Kiwi Popsicles1


After dealing with unpacking, laundry and a health check before I apply for the Visa, I finally got some time to sit down today. I made these popsicles before we left to visit my parents (more than 3 weeks back). It was so dang hot there, I missed these very very much. I had to constantly drink ice water/tea or eat ice-creams in order to stay cool. These popsicles are child’s play to make with just 3 ingredients and only 2 if you skip kiwi slices (do not skip though!). The watermelon I used was quite sweet so I didn’t have to use any form of sweetener for these popsicles. In case the watermelon you use is not sweet enough, feel free to add a tablespoon of honey or maple syrup or any sweetener of your choice while blending. These are just perfect for breakfast, post-workout snack or dessert.

Happy Hump Day you all! 😀

3-Ingredient Watermelon Kiwi Popsicles

Yields: 4 Popsicles | Prep time: 2 minutes | Chill time: 6-7 hours or overnight

Ingredients:

  • 2 cups watermelon cubes, seeded
  • 1 Tbsp freshly squeezed lemon juice
  • 4 kiwi slices

Directions:

Blend together watermelon and lemon juice in a blender. Slide in kiwi slices in each Popsicle-mould and pour watermelon mixture on top, dividing equally. Insert stick in the centre of each mould, cover and freeze for about 6-7 hours. To demould, run the moulds under warm running water for 30-50 seconds. Dig in immediately!

*Recipe can be easily doubled or tripled or quadrupled!
*For less sweet watermelons, add 1 Tbsp of sweetener of your choice while blending.


3-Ingredient Watermelon Kiwi Popsicles2

Skinny Chocolate Avocado Banana Pudding & Pops – Raw! ~ For Two

Raw Chocolate Avocado Banana Pudding1


Raw Chocolate Avocado Banana Pops1


Okay, so I”m ashamed to EVEN call this a recipe but in actuality it is! However simple it might be. Sometimes simple is all we need. Simple is beautiful. We are experiencing summer at full force and I want to spend minimum time in kitchen that too away from stove and oven. Of course, still wanting extraordinary food to appear magically on my plate so I’m all about quick recipes nowadays. Cold salads, iced coffees/teas, cold cereal, smoothies and frozen fruit treats are what my days are made of.

A raw pudding. And pops. Same ordinary ingredients with just a bit of tweaking gets transformed into two incredibly delicious desserts. Desserts which are healthy and skinny at the same time. All you need is a high-speed blender. And some chocolate, cocoa powder to be specific. And avocado and banana. Avocado-haters, do not fret. You can not taste avocado. Promise! My husband truly hates avocado from the bottom of his heart, if used in anything other than guacamole and he couldn’t tell! Yes, I didn’t tell him beforehand and he couldn’t make out. Win! Also, you can totally have these for breakfast! 😉


Raw Chocolate Avocado Banana Pudding2Raw Chocolate Avocado Banana Pops2


Each recipe serves two but you can easily double, triple or quadruple the recipe to serve more people or have bigger portions. Stay cool this summer with these cool recipes up your sleeves!

Happy Monday you all!

Raw Chocolate Avocado Banana Pudding:
Serves: 2 | Prep time: 2 minutes | Chill time: 3-4 hours
Ingredients:
  • 2 Tbsp unsweetened cocoa powder
  • 1/4 tsp instant coffee powder
  • 1/8 tsp ground cinnamon
  • Pinch of salt
  • 1/2 ripe (large) avocado
  • 1/2 ripe (large) banana (fresh or frozen)
  • 3 Tbsp honey/maple syrup/date syrup
  • 1/2 tsp vanilla extract
  • 10-12 dices of fresh, ripe mango, for garnish

Directions:

Place all the ingredients in a blender (place dry ingredients in the bottom so they don’t stick to the sides of the blender) and whip till you get completely smooth consistency. Divide the pudding between two ramekins/bowls and refrigerate covered for at least 3-4 hours. Serve, topped with mango dices.

*Consume the pudding within 1 day of making it.
*Instead of mango, you may use strawberries/raspberries.

Raw Chocolate Avocado Banana Pops:
Serves: 2 | Prep time: 2 minutes | Chill time: 8 hours/overnight
Ingredients:
  • 2 and 1/2 Tbsp unsweetened cocoa powder
  • 1/4 tsp instant coffee powder
  • Pinch of salt
  • 1/2 ripe (large) avocado
  • 1/2 ripe (large) banana (fresh or frozen)
  • 1/4 cup honey/maple syrup/date syrup
  • 1/2 tsp vanilla extract
  • 1/4 cup water

Directions:

Place all the ingredients in a blender (place dry ingredients in the bottom so they don’t stick to the sides of the blender) and whip till you get completely smooth consistency. Divide between two Popsicle moulds. If you do not have Popsicle moulds then divide between two paper cups like I did and cover with tin foil, poke the center of the foil with the Popsicle stick. Chill in freezer for at least 8 hours/overnight, demould and serve immediately.

P.S. Want to make these Pops even more chocolaty? Cover them with the chocolate magic shell just like a professional by following this easy-peesy tutorial.
P.P.S. Use white chocolate for these Pops! 😉


Frozen Sweet Lime~Pomegranate Cheesecake

Frozen Sweet Lime~Pomegranate Cheesecake1

You know how much I love cheesecake… It is my go-to comfort food more often than I would like to admit. Happy days and stressed days equally call out for cheesecake around here! I’m very finicky about my cheesecakes. Till now my most favorite has been a blueberry cheesecake from a particular cafe. It is heavenly and just how I like my cheesecake to be. And I would never dare to make one in my house as long as that cafe exists!
After trying and making so many different varieties of cheesecakes, I decided to whip up this no-bake, gelatin-free, creamy, cheesy, frozen dessert. Let me simplify this for you. This dessert is nothing but a cheesecake ice-cream which is layered over a salty, buttery, chocolaty crust.
My refrigerator was bursting with sweet and juicy pomegranates. It was a flavor I had never tried before in a cheesecake. I thought it would make a delicate and lovely pairing with cream cheese. To make things tangy, I used up zest and juice from a sweet lime. The result was such a gorgeous baby pink color cheesecake! I just fell in love with it 🙂
Frozen Sweet Lime~Pomegranate Cheesecake3
I went sweet and salty route this time. The crust for this cheesecake is made with chocolate Oreos, butter and just a pinch of salt. This salty kick enhances the cheesecake flavor to another level. If you’re not a fan of sweet-n-salt, feel free to skip the salt as it will still taste divine! But I highly recommend salt as it is not too over-powering. So promise me you’ll add it to know what I’m REALLY talking about… You’ll thank me! 😉
Frozen Sweet Lime~Pomegranate Cheesecake2
Frozen Sweet Lime~Pomegranate Cheesecake4
I made a big batch as I was having company but you can easily halve the recipe and make it in 4-inch spring-form pan. The frozen cheesecake tastes best when eaten within 12-15 hours of being made. It becomes harder and icier the more it stays in the freezer. In case of leftovers, let it thaw for 15 minutes before serving.
Frozen Sweet Lime~Pomegranate Cheesecake with Salted Oreo Crust
Makes: 10-12 slices | Prep time: 20 minutes | Cook time: 0 minute | Chilling time: 4-5 hours
Ingredients:
Crust:

  • 15 chocolate Oreos or any chocolate sandwiched biscuits
  • 3 Tbsp melted butter
  • 1/4 tsp salt
Cheesecake Filling:
  • 3 pomegranates
  • Zest and juice from 1 sweet lime
  • 1/2 cup + 1 Tbsp icing sugar
  • 2 8 oz. package cream cheese, at room temperature
  • 2 cups medium-fat fresh cream (40% fat), chilled

Direction:

  1. Line 9-inch round spring-form pan with parchment paper. Grind Oreos in a food processor until you have fine crumbs. Add melted butter and salt. Spoon the crust and press down firmly over the base using flat base of a glass. Chill in refrigerator while you make the filling.
  2. Remove morsels from pomegranates, save morsels from half pomegranate and juice rest of the morsels with lime juice. Strain the juice into a bowl, add icing sugar and whisk to dissolve.
  3. In a large bowl, take cream cheese and whisk until smooth. Use electric hand mixer/stand mixer for this. Add juice and sweet lime zest to cream cheese and whip till combined.
  4. In a separate bowl, whip the fresh cream till soft peaks form. Gently fold it with cream cheese mixture to achieve a lump-free consistency.
  5. Remove spring-form pan from the refrigerator and spoon the cheesecake filling over the crust. Let it chill in freezer covered in cling film. After 1 hour, sprinkle with pomegranate seeds and return to chill in freezer for another 3-4 hours. Once set, release from spring-form pan, slice and serve. Run the knife under hot water before slicing.

Note: Can be consumed as a sweet lime~pomegranate cheesecake ice-cream if frozen without the Oreo crust.

Strawberry Fool & DIY Chocolate Cups

I hope to write a small post! Is that even possible? Humph.. Let’s try and see..

I’m writing about this easiest dessert ever today… It is an English classic! I’m talking about Strawberry Fool.. The name says it all! It is so simple that any fool should be able to make it! No kidding 😀

Strawberry Fool1

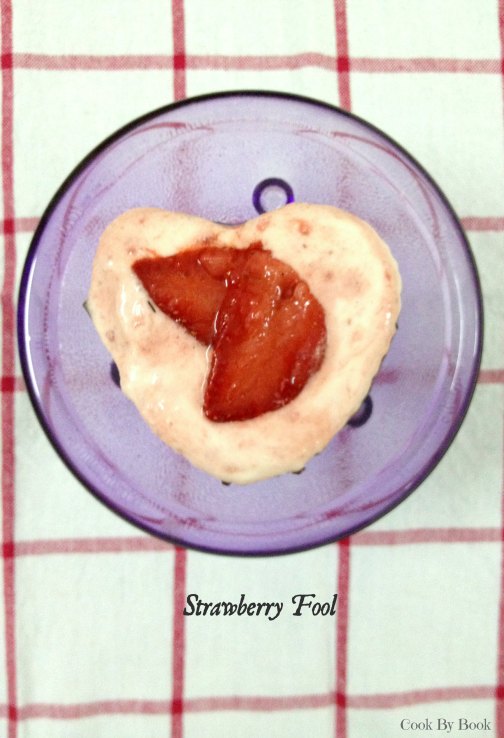
The fool ~ this dessert is nothing but sweetened fruit folded into stiffly peaked and slightly sweetened whipped cream. THAT IS IT! Berries work perfectly for this dessert, especially strawberries. Kiwi and rhubarb would be a nice twist too.

For serving my fool, I made heart-shaped chocolate cups! Do you remember my post “Brownie Bombs“? I had mentioned in that post that even after coating all the cake pops generously I still had some left-over melted chocolate. I had to think on my feet… How to turn this left-over melted chocolate into something amazing and this impromptu idea came to my mind. Very easy to make. All you need is silicone cupcake liners.

Chocolate cups are so easy to make that once you’ve started, it is difficult to stop. You’ll find yourself stuffing them with all sorta yumminess out there! Imagine your favorite peanut butter, ice-creams, mousse and cheesecake served in these edible chocolate cups. Now no need to lick the plate!

Strawberry Fool & DIY Chocolate Cups1

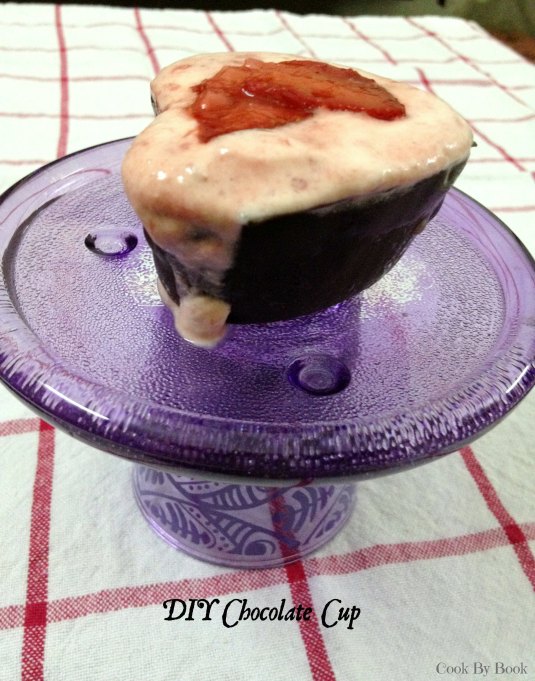
DIY chocolate cup seated on my DIY cupcake stand!

Don’t overfill the cups with fool like I did! 😛

Chocolate and strawberries are match made in heaven. So serving strawberry fool in a chocolate cup makes for a perfect and elegant party-dessert. Chocolate cups can be made ahead and stored in refrigerator for months and strawberry fool is a no-cook, no-nonsense dessert. Perfect for last-minute dessert-fix or midnight-cravings!

P.S. I’m sorry but I do not have step-by-step photos for chocolate cups. As you can imagine my kitchen and hands were covered in chocolate. 😛 But do not worry. These are easy-peesy to make and you will not require my horrible photographic skills to show you that.

DIY Chocolate Cups:

Yields: 4 cups

Ingredients:

  • 50 gm dark chocolate*, melted
  • 4 silicone cupcake liners, frozen for 5 minutes
  • small sheet of grease-proof baking paper

Directions:

For detailed information on how to melt chocolate: Refer to this post

Method-1:

Dip the outer surface of the silicone liner into the melted chocolate. Remove the excess chocolate by giving the liner a slight shake. Ensure that the chocolate coats the liner evenly. Upturn the liner and place it on grease-proof baking paper. Refrigerate for 10 minutes.
Dip the liner again in the melted chocolate to get a thicker layer of chocolate and refrigerate again. Repeat these steps to make 3 more cups.
Once cool, separate the chocolate cups from silicone liners slowly and carefully. Refrigerate till the time of use.
Method-2: For this method a small paint brush will be required.

Paint a thin layer of chocolate onto the inside of each cupcake liner. Refrigerate them for 10 minutes.
Paint a second thin layer of chocolate on top of the first layer and refrigerate for another 10 minutes.
Carefully pop the chocolate cups out of the liners. Refrigerate till the time of use.

* Feel free to use white chocolate or mix of dark and white chocolate.

Strawberry Fool:

Yields: 4 servings | Prep time: 10 minutes

Ingredients:

  • 6 large frozen strawberries, hulled and thawed
  • 3 Tbsp caster sugar
  • 1 cup fresh cream (medium fat 40%), chilled
  • For garnish: 2-3 strawberries, sliced or any cookie of your choice, crumbled

Directions:

  1. Chill mixing bowl and beater in freezer for 5 minutes.
  2. In a food processor, blend strawberries to a smooth puree. Mix 2 Tbsp sugar in the puree and set aside.
  3. Remove mixing bowl and beater from freezer. Add fresh cream to the mixing bowl and whisk. Gradually add 1 Tbsp sugar to the cream and whip till you get stiff peaks.
  4. Fold the strawberry puree in to a whipped cream until nearly incorporated, leaving a few streaks of whipped cream and strawberry puree. Divide the mixture among 4-chocolate cups. Serve immediately garnished with strawberry slices/cookie crumble or refrigerate for up to 2-3 hours.

P.S. Writing a short post requires a skill I don’t seem to possess! Have a happy weekend! 🙂